
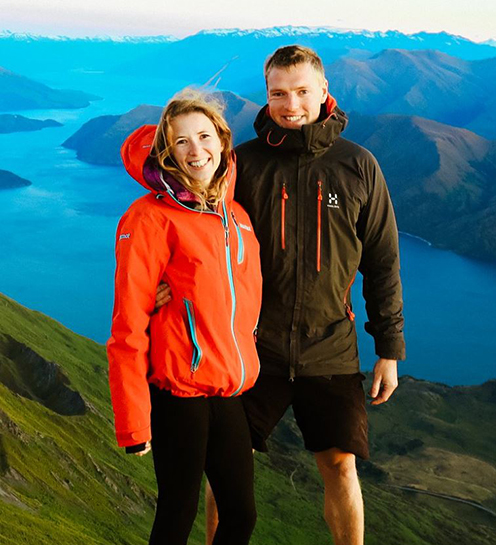
Welcome to Mike and Holly’s Vanlife blog. Here we will share our renovation stories, things we have learnt, found useful and that have gone wrong… Follow our story on Instagram here.
Stage 1 – buying
We had been keeping an eye on the market for a long wheel base since Autumn 2019. We had a great time testing out living in a van in New Zealand for 6 weeks the previous year (read blog here). So we knew 2020 was the year to make the leap.
We started looking for a van properly in March – just a Covid-19 approached and lockdown happened. That was when everyone was looking for a van as staycations were going to become more popular and people started delivery driving jobs. Vans soon became a rarity. After three months and hours scrolling through the internet we eventually found one! (We did find one sooner, but I wont bore you with the details, it had various things wrong).
Stage one realisations:
All garages will say they have that van coming in next week – they do not.
They say they will call you back – they will not.
That advert you see online isn’t of the exact van you are enquiring about – they just can’t be bothered to update the ad.
Stage 2 – windows
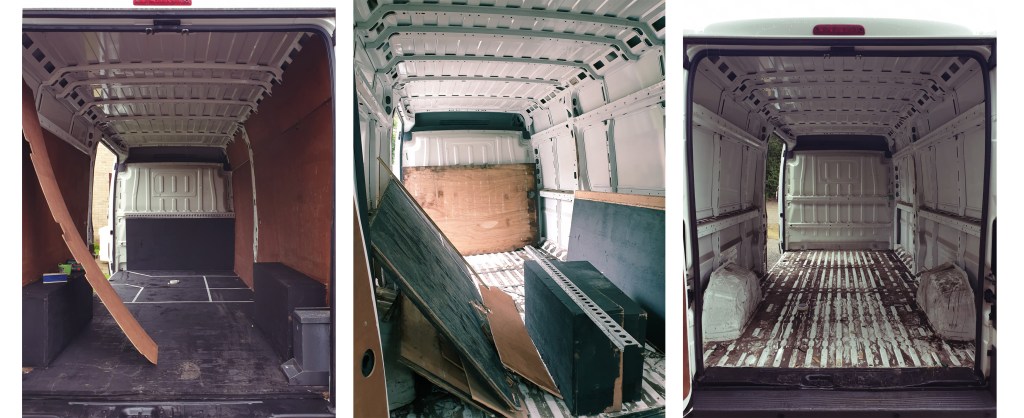
HPI checks complete and the van was finally on our drive, hooray! Our dream is now a reality. We have a set budget in mind and fingers crossed we stick to it. The first job was to sound deaden using Dodo Matting (you can buy it here) and take out the safe. We haven’t managed to open it yet – I wonder what is in there?!?!

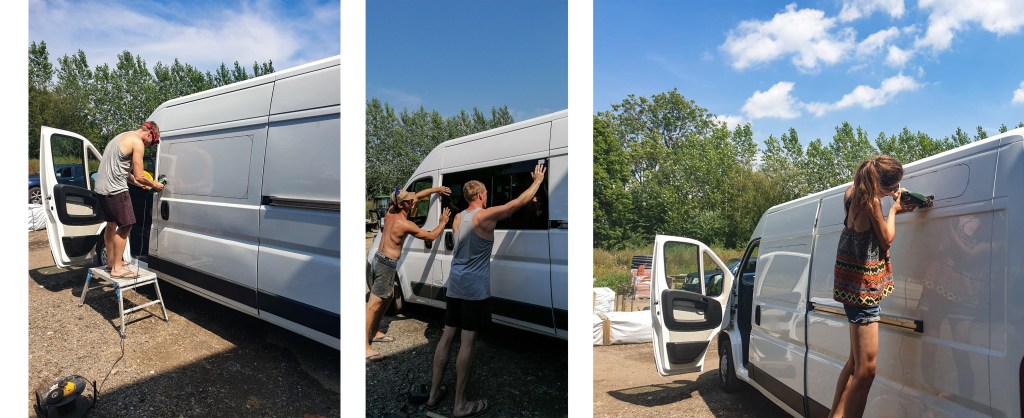
We took a while deciding where to buy our windows from, but eventually chose the website and brought the fitting kit with them. It was the simplest thing to do and also doesn’t work out that much more expensive. Josh, Holly’s brother was the first person to help us out! He, and his tools were amazing with getting the windows in.
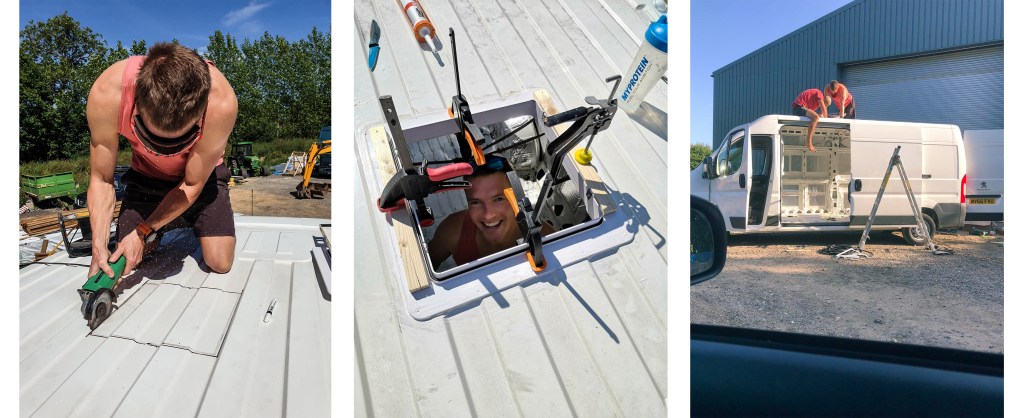
Our roof fan was the next thing to go in. We just wanted to get all the holes in the outside of the van cut as soon as possible, as you can’t move on with anything else until it is done. The fan we chose was a MaxxAir MaxFan Deluxe. We chose this because of the thermostat, remote and automatic features.
Stage 2 errors:
Make sure you clean off every teeny tiny bit of metal from cutting straight away, they will rust and are a pain to sort. We can’t stress this enough.
Don’t put the black primer too thick and wide onto the panels as you will see it once the window is on, and again, is a pain to hide.
Allow for the edging thickness when marking up the window cut lines, this will add an extra 6mm on (roughly) and will save you cutting it again!
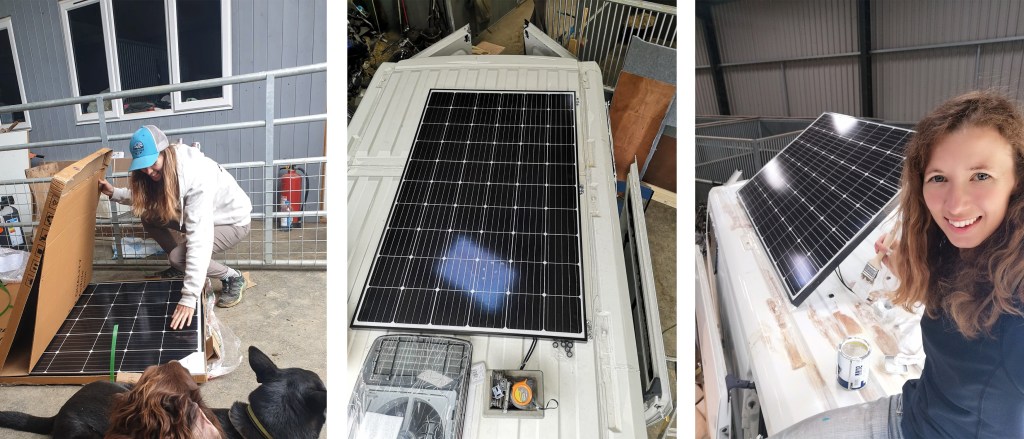
Stage 3 – solar & battening
It took us ages to find the right Solar Panel. It was a large expense which we didn’t want to get wrong and have to send back. We finally found the one that was right for our set up. We needed it to power our usb sockets, fridge, laptop (via inverter) and that’s about it as the oven, hob and shower will be gas. We chose a Perlight 320 Watt Mono Panel. The white one was cheaper than the black so we went for that.
We decided we wanted our solar panel to be able to lift up, one because we could clean under it and second because if we were say, in north Norway then we could angle it to make the most of the sun! Just note that it didn’t come with cables long enough so that set us back a few days as we had to wait for new cables.
Here you will see that Holly is repainting all the specks of rust (after being painted with Hammerite Kurust, we mentioned earlier. It took ages and was a pain but hopefully it will work.
Battening was the next job at hand. We tried to use what the van had in terms of panels. We used self-drilling screws. Our friend Jen came to see us and help out. Thanks Jen! I am looking forward to getting family and friends involved in this build, as that is all part of it I guess.

Stage 3 realisations:
We didn’t make too many mistakes at this stage actually but we did learn that having nice weather makes this process so much easier! We have now ordered our insulation for the next stage. Oh, and we have just brought the fridge. Exciting!
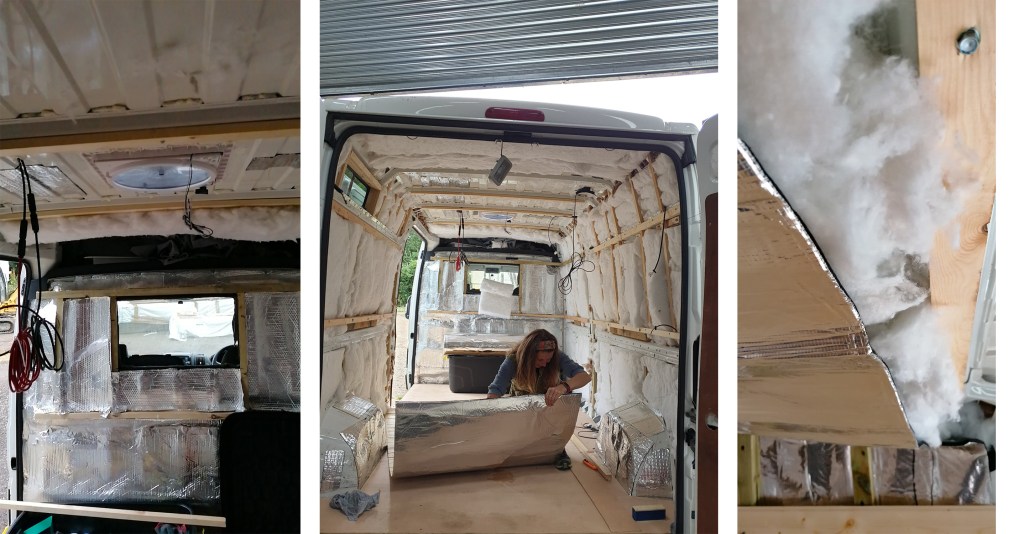
Stage 4 – electrics & insulation
So before the insulation could go up, we had to wire in the electrics. This is something that neither of us have experience in. We decided to crack on and buy the wiring and put it in place ourselves. This is where we made a big mistake, we brought the wrong two-core wiring, who knew there were so many different types. So once it was in, we found out it was wrong so had to start again, this time with the correct wires! The wire we ended up using was 30 meters of 2mm2 Thin Wall 2 Twin Core Cable Wire.
We scheduled in a day with our friend James who happens to be an Electrical Engineer who slaved away for over a day but by the end of it we had power! Such a great day, thank you Upton!!
This is probably one of the stages that took the longest ordering things, we brought a sine wave inverter, a 12v battery, battery charger, battery isolator, a 12 way blade fuse box, mppt controller and little things like terminal connectors.

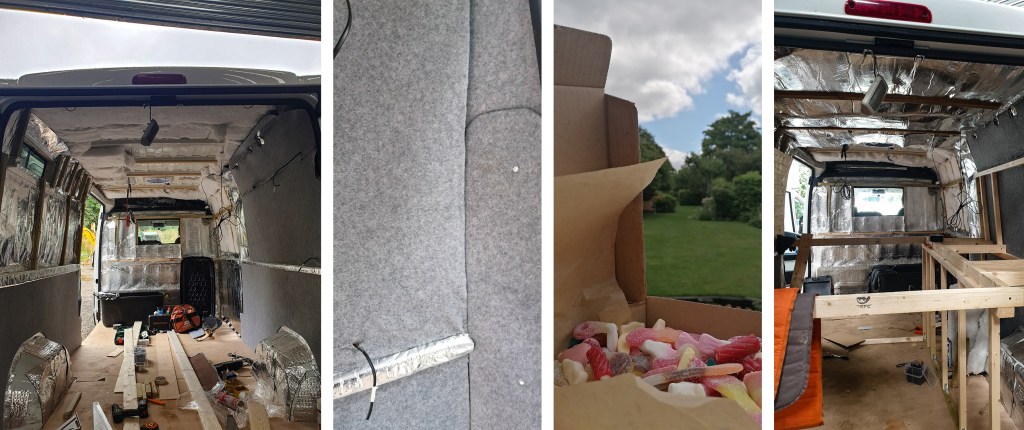
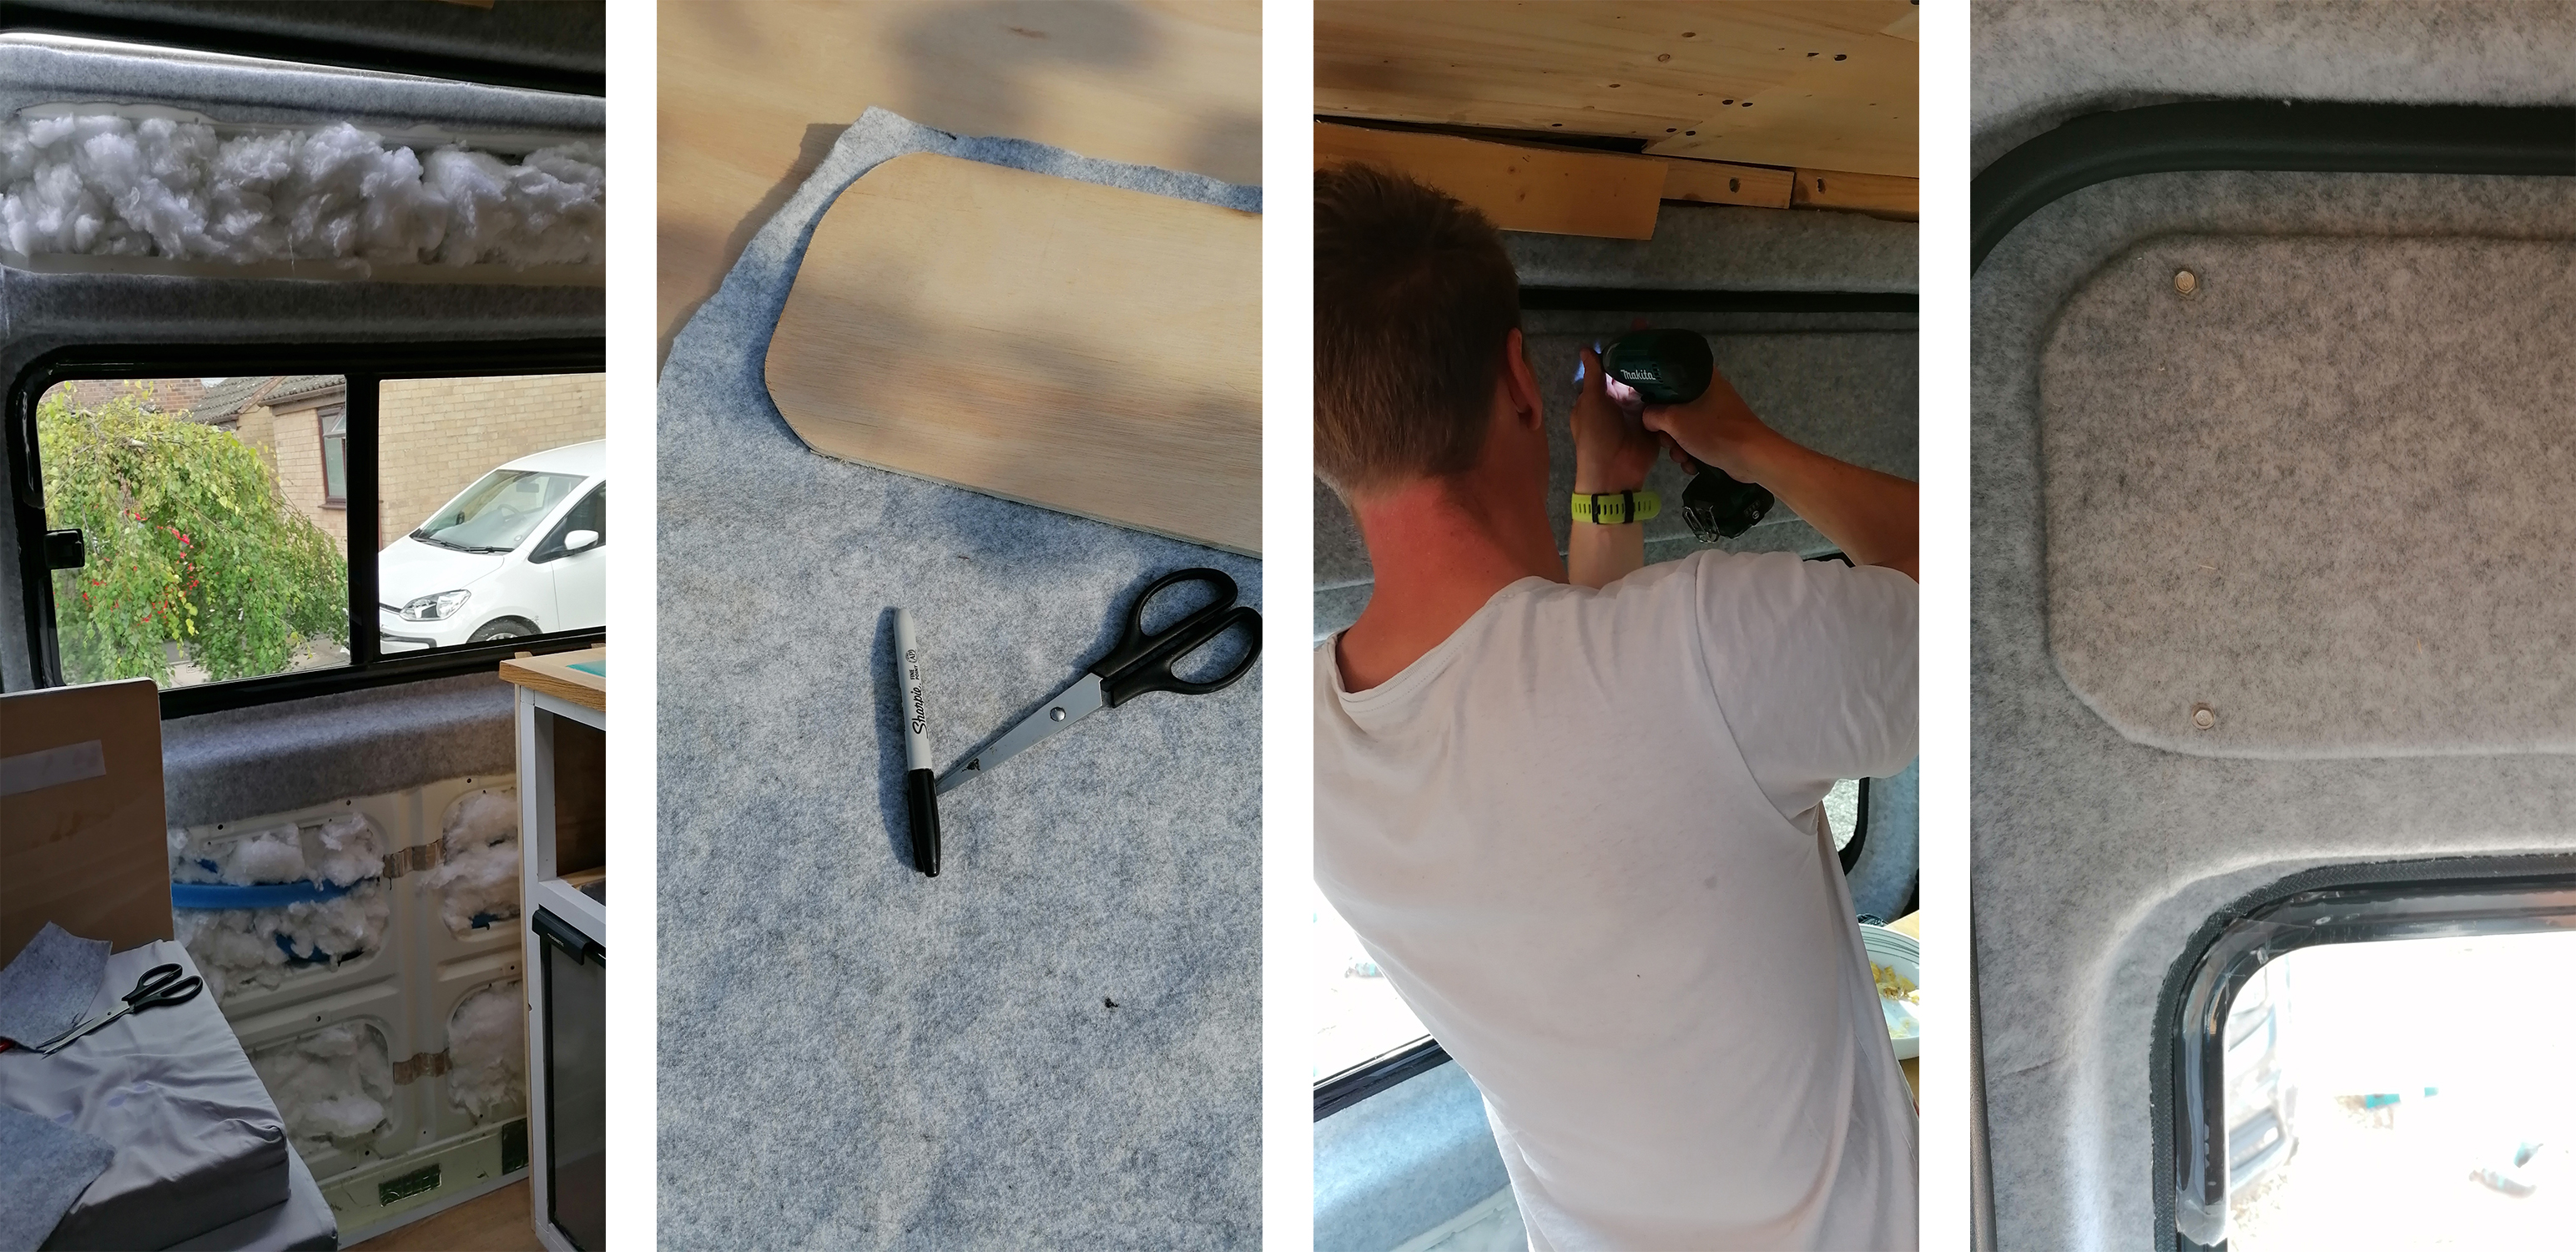
For our insulation we chose 10mm Dodo Thermal Fleece which is made from recycled plastic bottles, and then we chose to do a thermo vapour layer too. Might be overkill, we’re not sure yet. Our main reason was that if we wanted to go away in winter or to cold countries then at least we have the option without freezing.
We found the fleece really easy to work with. We applied it with a little spray glue and noticed the difference in temperature straight away whilst working in the van. The vapour layer on the other hand was okay to work with, the backing is really tar like, which I guess it needs to be. But it is definitely a two person job.
Stage 4 errors:
Double check the wiring you need, there is more than one type of 2-core!
It turns out you can’t buy everything for your van conversion from Screwfix and Wickes!
Don’t even bother with the wire clips where you need a little screw driver thing, just get yourself some of these orange clips in the image above and save yourself so much time and hassle.
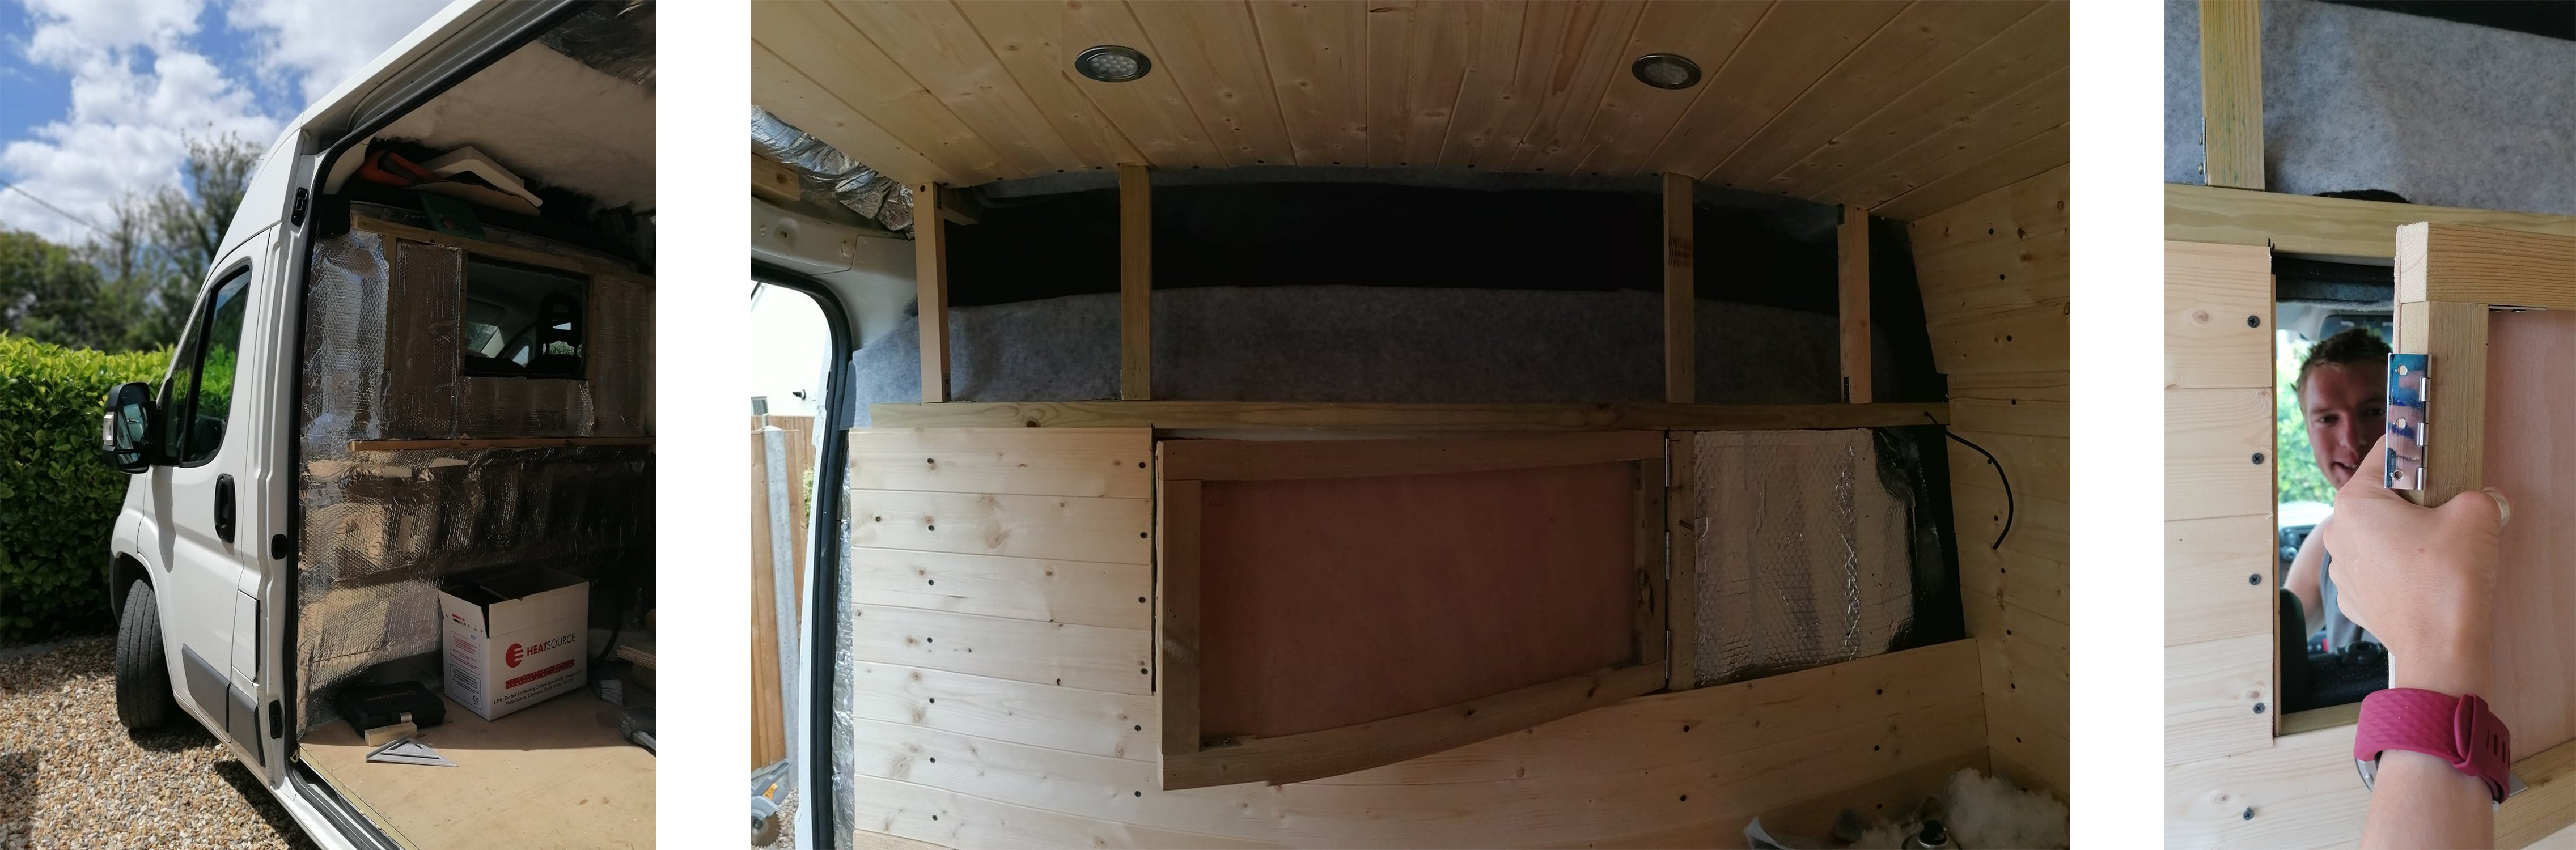
Stage 5 carpet & bed frame
So once all the vapour layer was in we put up the 32mmx32mm battens for the cladding to screw into. We just used the vans curves to work out where was best for these.
Whilst Mike did most of the battening, Holly was carpeting the 5mm ply board which is going to line the garage and the back of the wardrobe space. The carpet we used was 4 way stretch van lining.
Also, side note, if you are doing your own conversion and need a bit of a sugar rush, then you have to get a delivery (plastic free) and pick your own little bites of joy from Glossop Pick and Mix. You can thank me later.
So once the ply was in, we started building the bed frame. This was quite exciting as it was the first bit of structure which wasn’t going to be hidden. For the rectangle base we used 2×4 studwork. Then for the extra supports we used mainly 32mmx32mm battens. We made it high enough to fit a mountain bike in with the front wheels off. The bed size was based on the mattress we have which is the Outwell Dreamcatcher Double 7.5cm. So we made the frame to fit, which is 130x195cm. Whether basing our design on an inflatable mat is a good idea or not, only time will tell!
Stage 5 notes:
Looking back, make sure you take photos of where your battens are as this will be useful for future reference.
Make sure the roof battens go all the way to the end, even if this means carving them to fit the curve of the van.
We ended up buying two lots of 11m2 carpet. You will need more than you think.
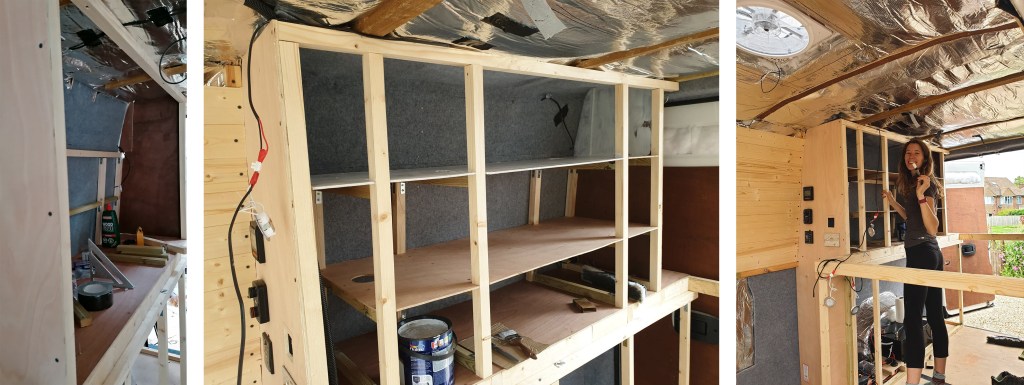
Stage 6 – wardrobe & cladding
The wardrobe – Initially we made the wardrobe 35cm wide, but because of the mattress we had, we made it 40cm wide. We used 32mm battens for this and 9mm ply for the flooring of the wardrobe. Not quite sure what the finished look is going to be like but we are not carpenters so we are just doing what we can to make the most of the space, and to keep the weight down.
The wardrobe is lined with carpet and the wood is painted in an off white colour. It will do the job but now it is working out how to make it look good! Pinterest, here we come!
For the cladding we went for Wickes softwood 8x94x2400mm. We also ended up using a couple of longer 3meter packs for the ceiling. We started at the bottom side of the bed and up to the small vent window. We chose screws instead of cladding clips just for ease. It actually went in reasonably well. But you will find that you have to loosen off each piece before placing the next one in, something which we always forgot so kept screwing them down tight, before remembering we need to loosen them off again now for the next piece. Durr!!

Once we completed the side, we did the roof, this is where we had to have organised the roof light placement so we could drill the holes in the right places. After this we completed the roof. Then we did the side wall that is going to be in the kitchen area.
We have left the corner join as we haven’t worked out how to tackle this yet. We next need to clad the bulkhead and where the rest of the lights go in the roof.

Stage 6 Changes:
We would have stuck to our guns and kept the bed wider and made the wardrobe smaller.
Buy more than you think you need. You will use it and it saves you going back and forth to Wickes again and again.
Make sure you check the cladding packs for the grooves as some packs didn’t have it and therefore redundant for the task at hand and taking it back to the shop is a pain.
Stage 7 – lights & sockets
Initially we started looking at lighting styles for houses, I thought maybe they could work, but in such a small space they all would have stuck out too far, also the depth they needed behind the cladding is too deep. We only have a few cm to play with. So that idea went out the window.
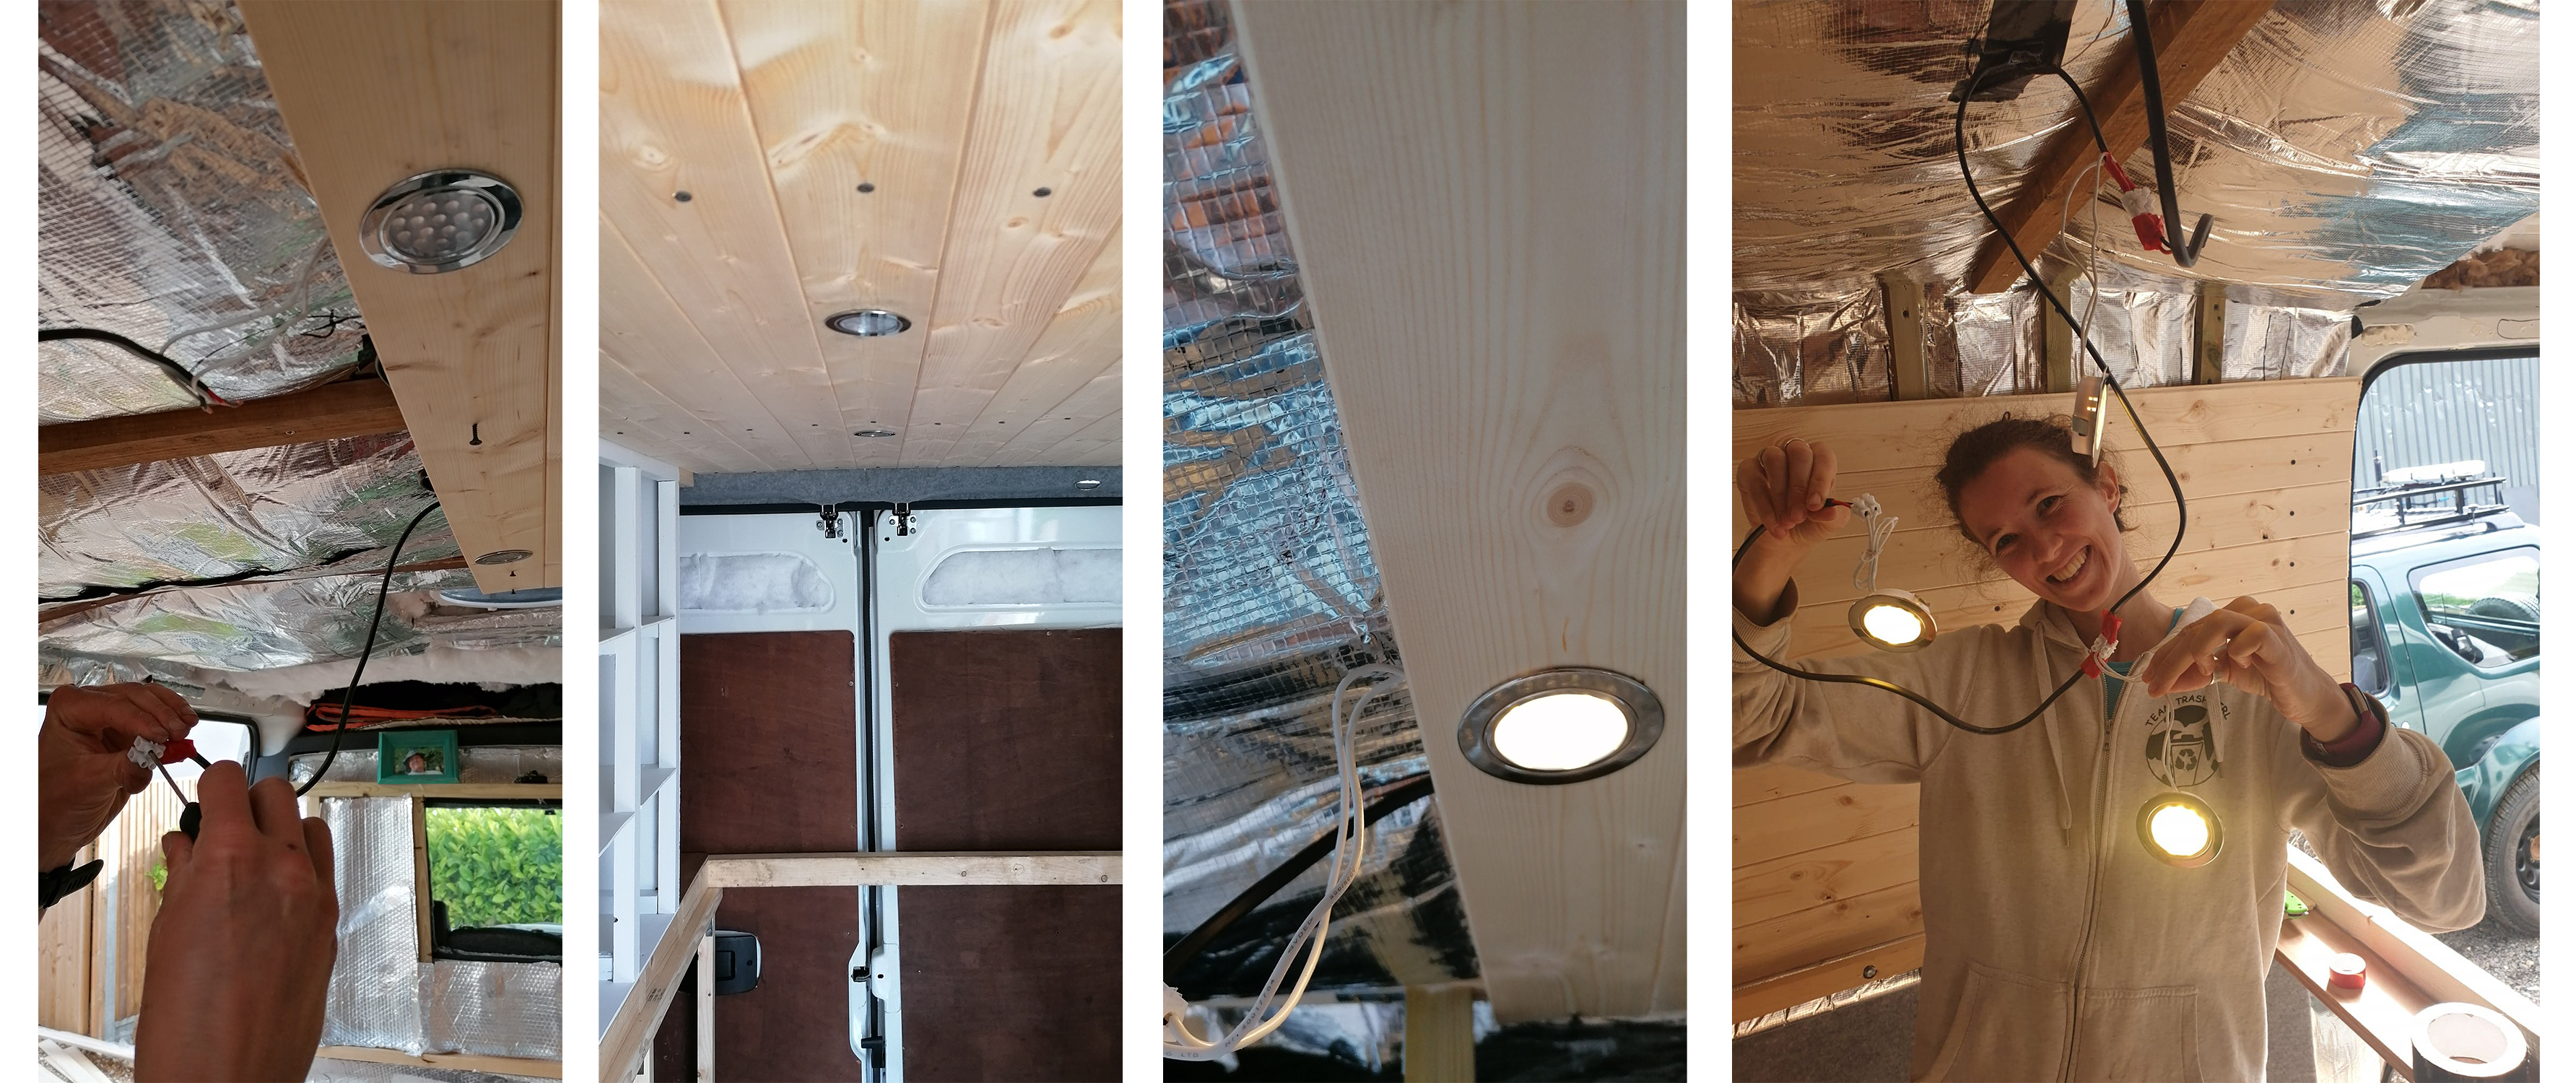
We knew we wanted touch lights and so I found these Dimatec 12v 18 LED 1.2w lights in warm white. They were perfect for what we wanted but weren’t sure how many we would actually need. I knew we needed some over the oven, and then for the bed area but for there I wanted two reading lights on the side.
We started looking on caravan and motorhome specific websites for lights, and were flooded with some really awful, plasticy designs. I was adamant we would find something that looked good. Eventually we did. They touch on and off individually but only turn off all together on the switch. We can’t work out how to make them all turn on from the switch.
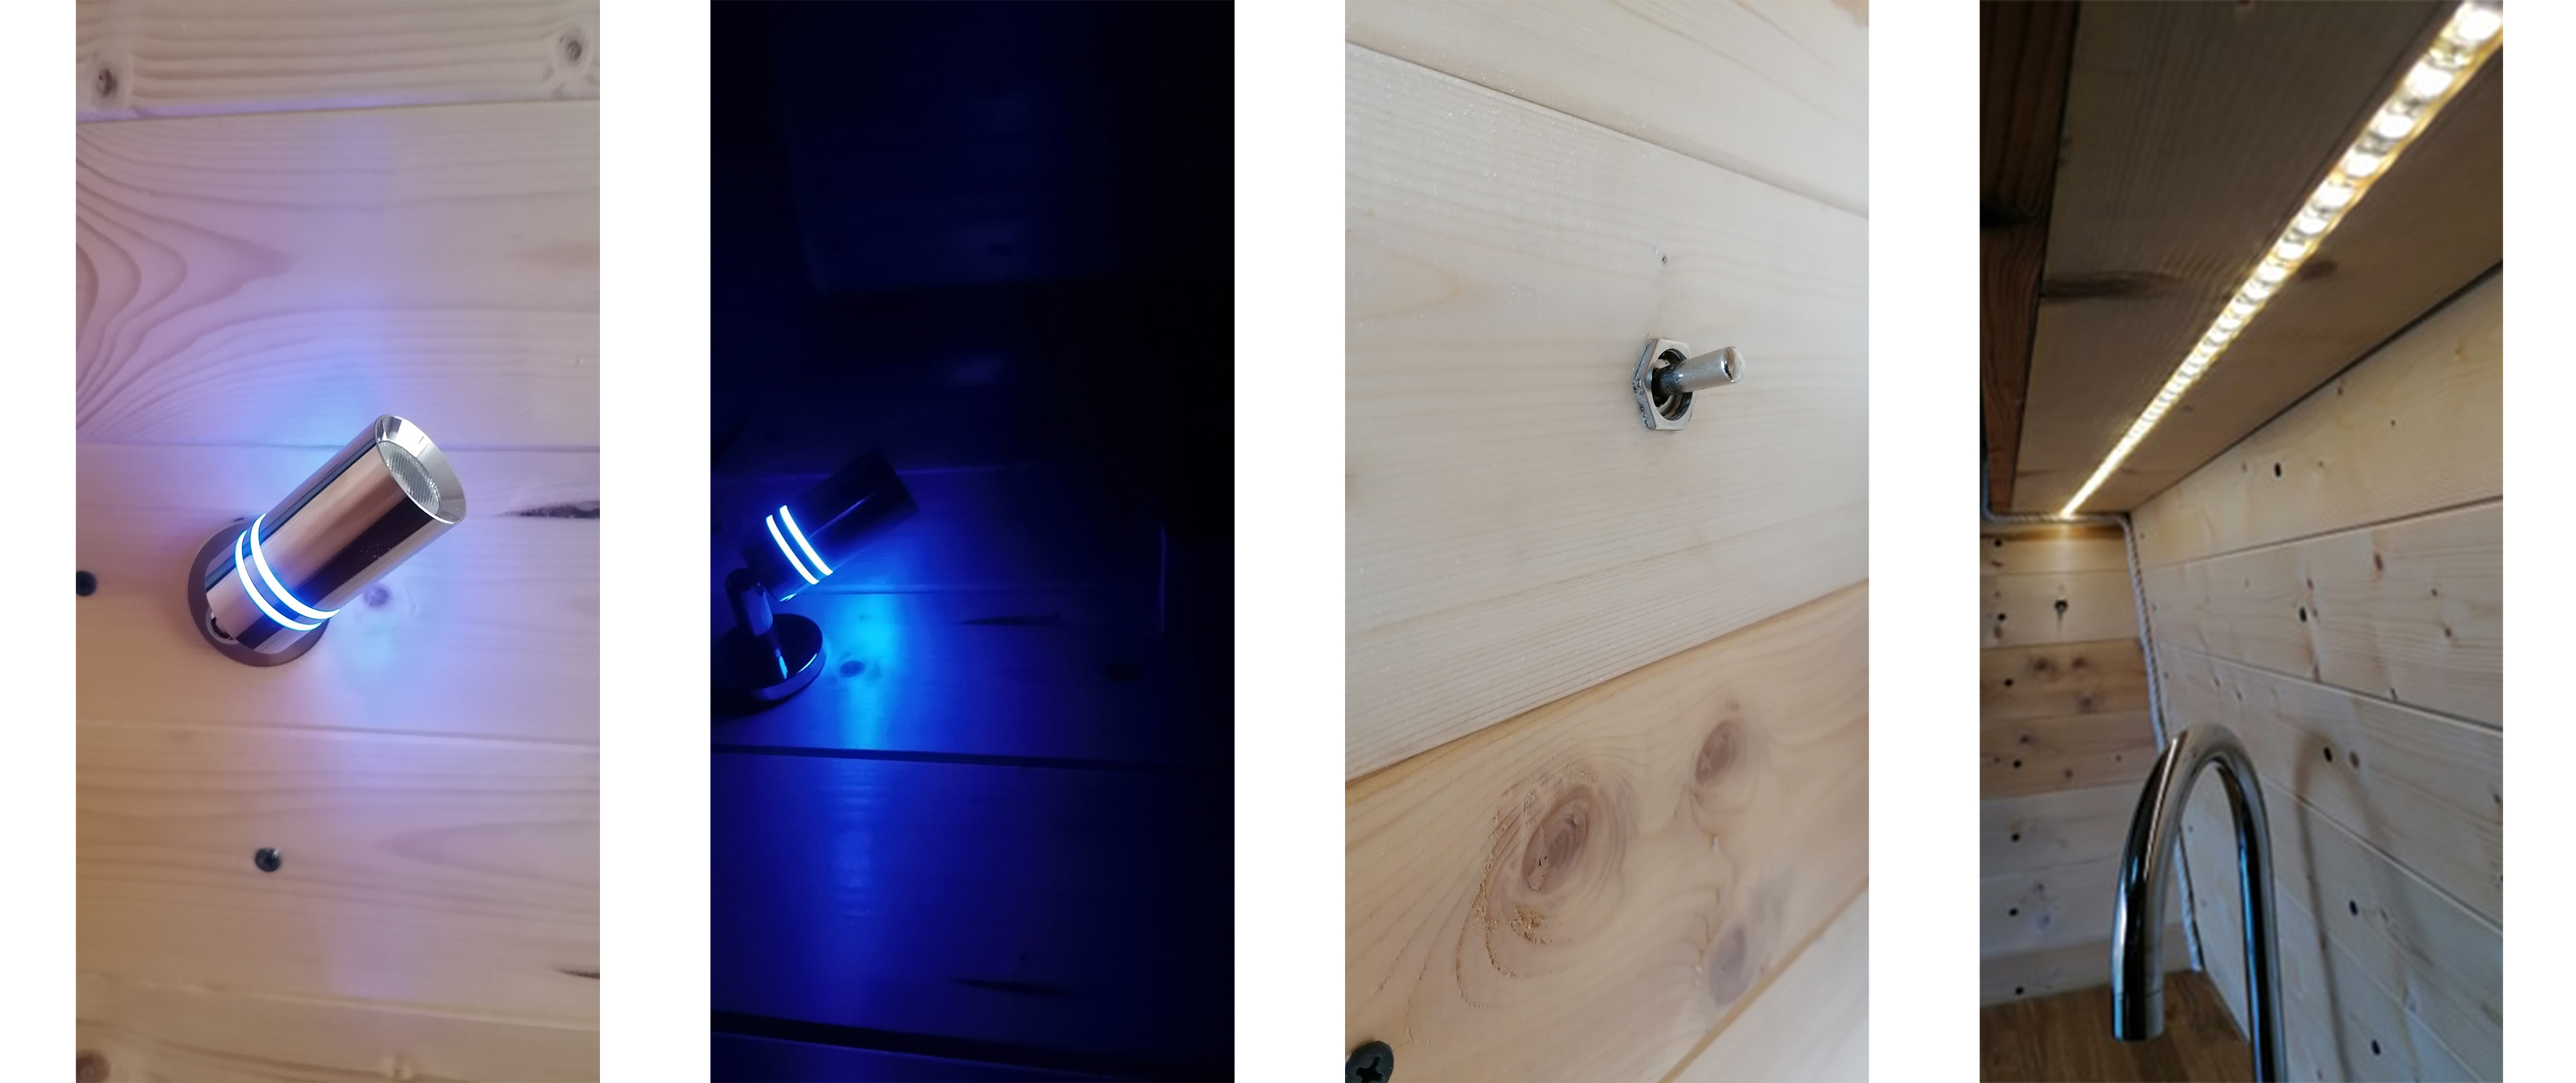
I found these little beauties which are touch sensitive, they dim and they have a pretty blue light on. Perfect!
Also in the kitchen we have put in an under shelf led strip in warm white, which flicks on at the side. I love this feature and I think it looks stunning.
When it comes to sockets we wanted usb chargers for things like the speaker and phones, then the 3 prong for laptop and camera batteries from the inverter. We put these 12V/24V plug socket close to all the other appliance pieces. We then put one usb by the bed head, one by the other plug socket.

Stage 7 thoughts:
Might have gone a bit overkill with the lights, but there’s only one way to find out.
Perseverance works when looking for your perfect lights, don’t just go for the first ones you see.
Might need to add some fairy lights, but we will only be able to know where to put them once we are living in it.
Stage 8 – the bulkhead
We had a couple of options when it comes to the bulkhead, remove it or clad it. We chose to clad it as that allows us to have more space in the lower part of the kitchen. (An extra 15cm or so!) We put some sound deadening sheets onto it and then carpeted the cab side and reused some old silver bubble insulation of the ‘home’ side. Then we clad and carpeted the holey bit at the top. But then we had to work on the escape hatch!
Initially we were going to put in a porthole which I really wanted however, it was too thick and was going to be too difficult so we chose to put in a hatch. I love this feature and we will be sharing all the final details like latches and curtains as and when we get to it in this blog!
Stage 8 thoughts:
If you have the carpentry skill then it would be worth taking the bulkhead out and just cladding the whole area with the angle to save space and weight.
It’s worth putting the slats in for the kitchen area at the same height at the work top so the same piece of wood can do two things.
When cutting the carpet from the cab side for the hatch, make sure to cut excess carpet so you can fold it over the sharp metal neatly. I did not allow for so much space so have had to stretch it and its not the neatest of jobs.
Stage 9 – the kitchen!
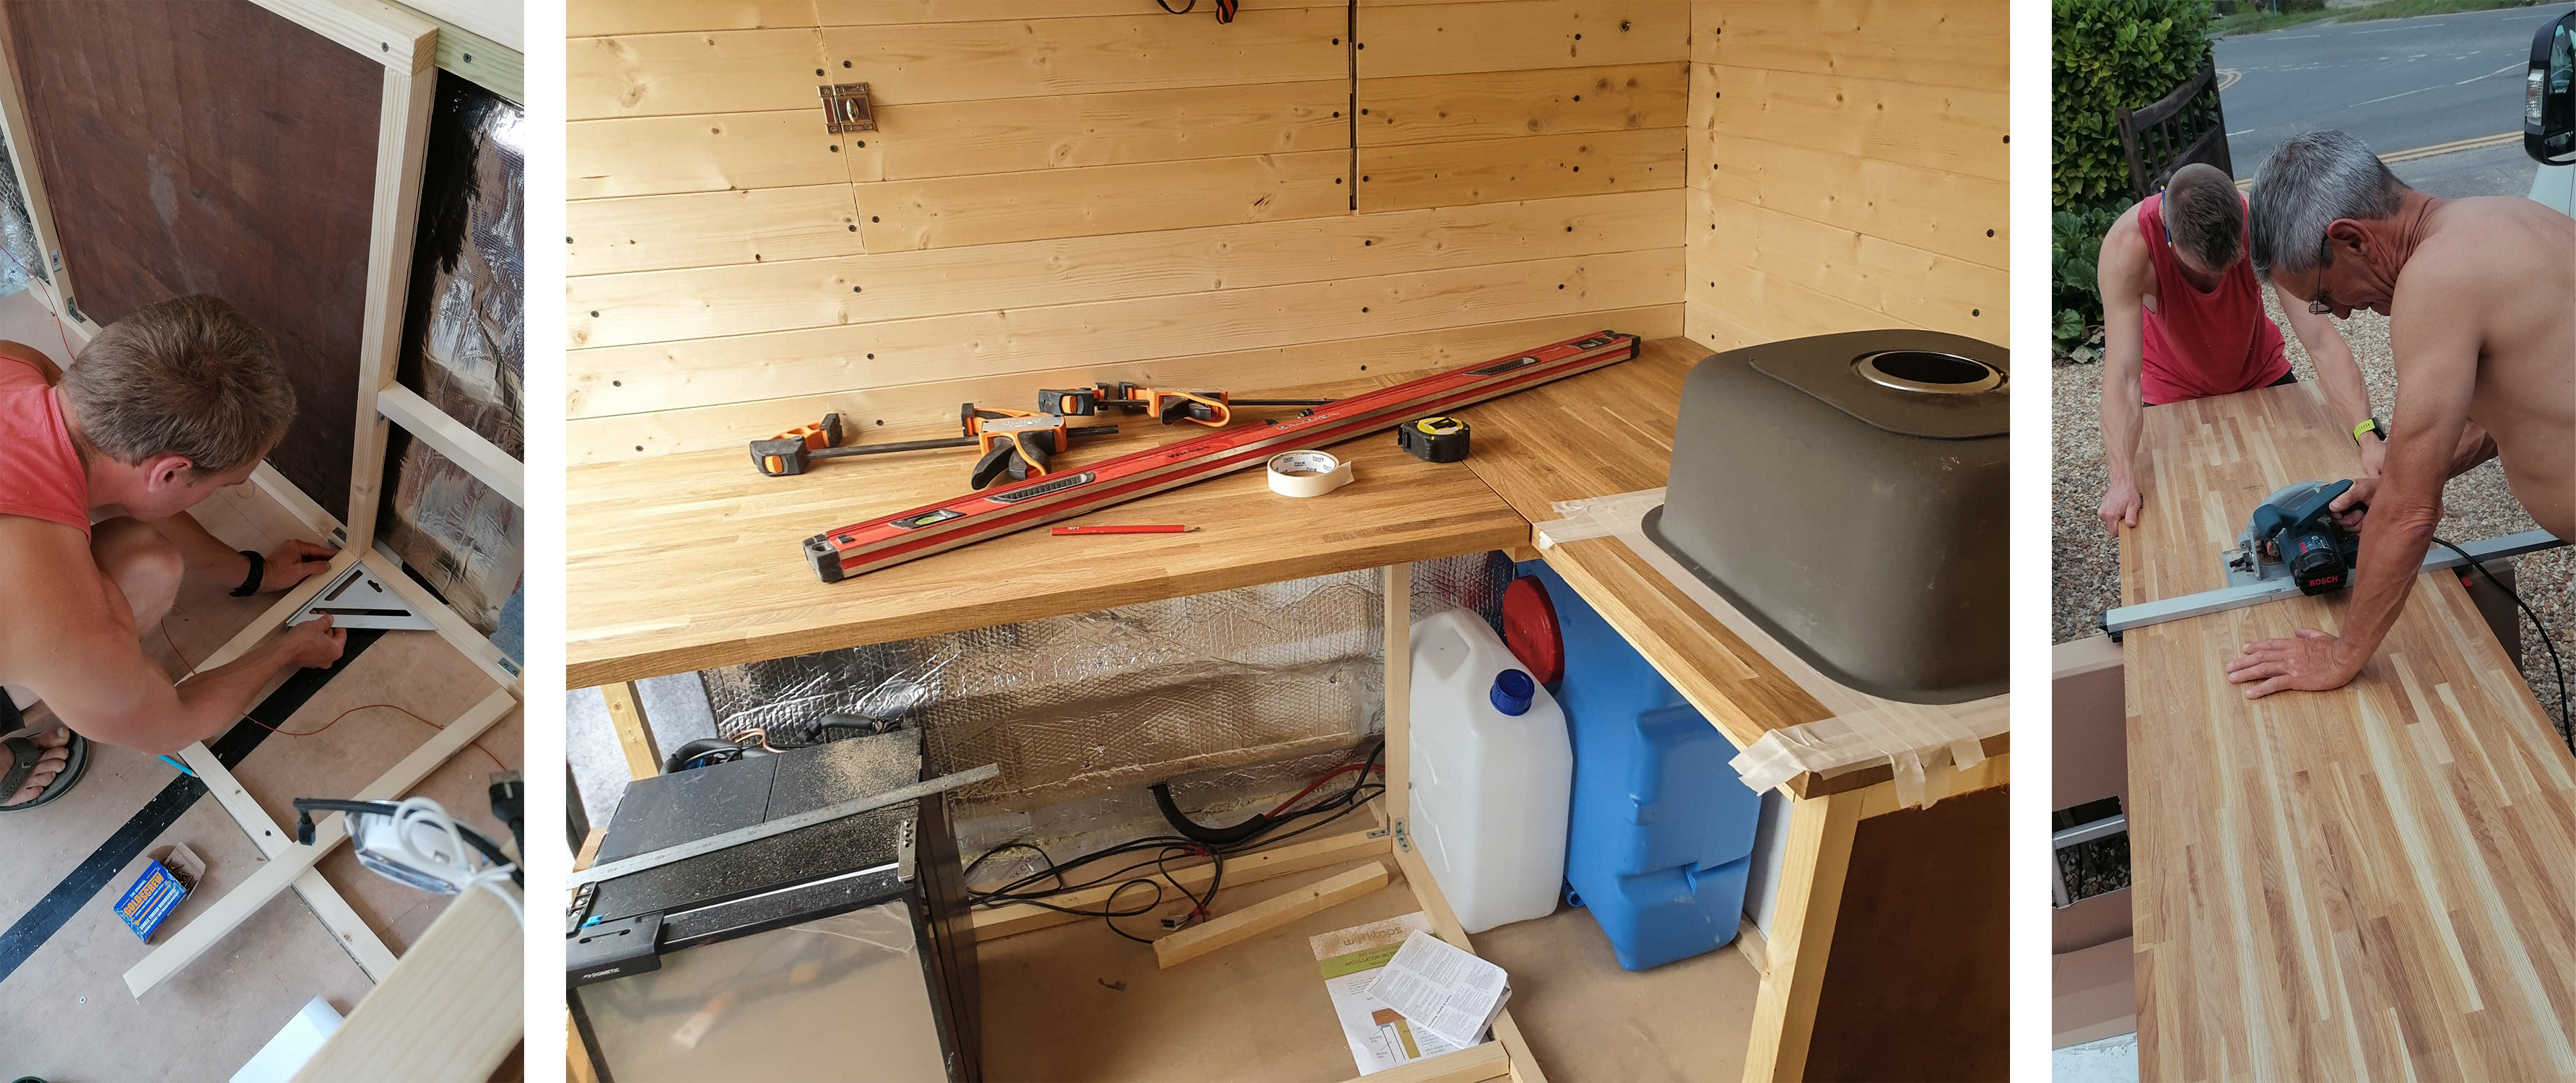
So, we built the frame from 32x32mm and loads of corner brackets. We got the Oak worktop from good old Wickes. We played around with the design quite a bit, initially the sink was by the doorway but we ended up with the fridge by the door. Ian was a great help with cutting the straight edges for the worktop and the hole for the sink. He was also great at advising us with the plumbing! We brought our undermount sink and Chrome Kalel tap from Wayfair.
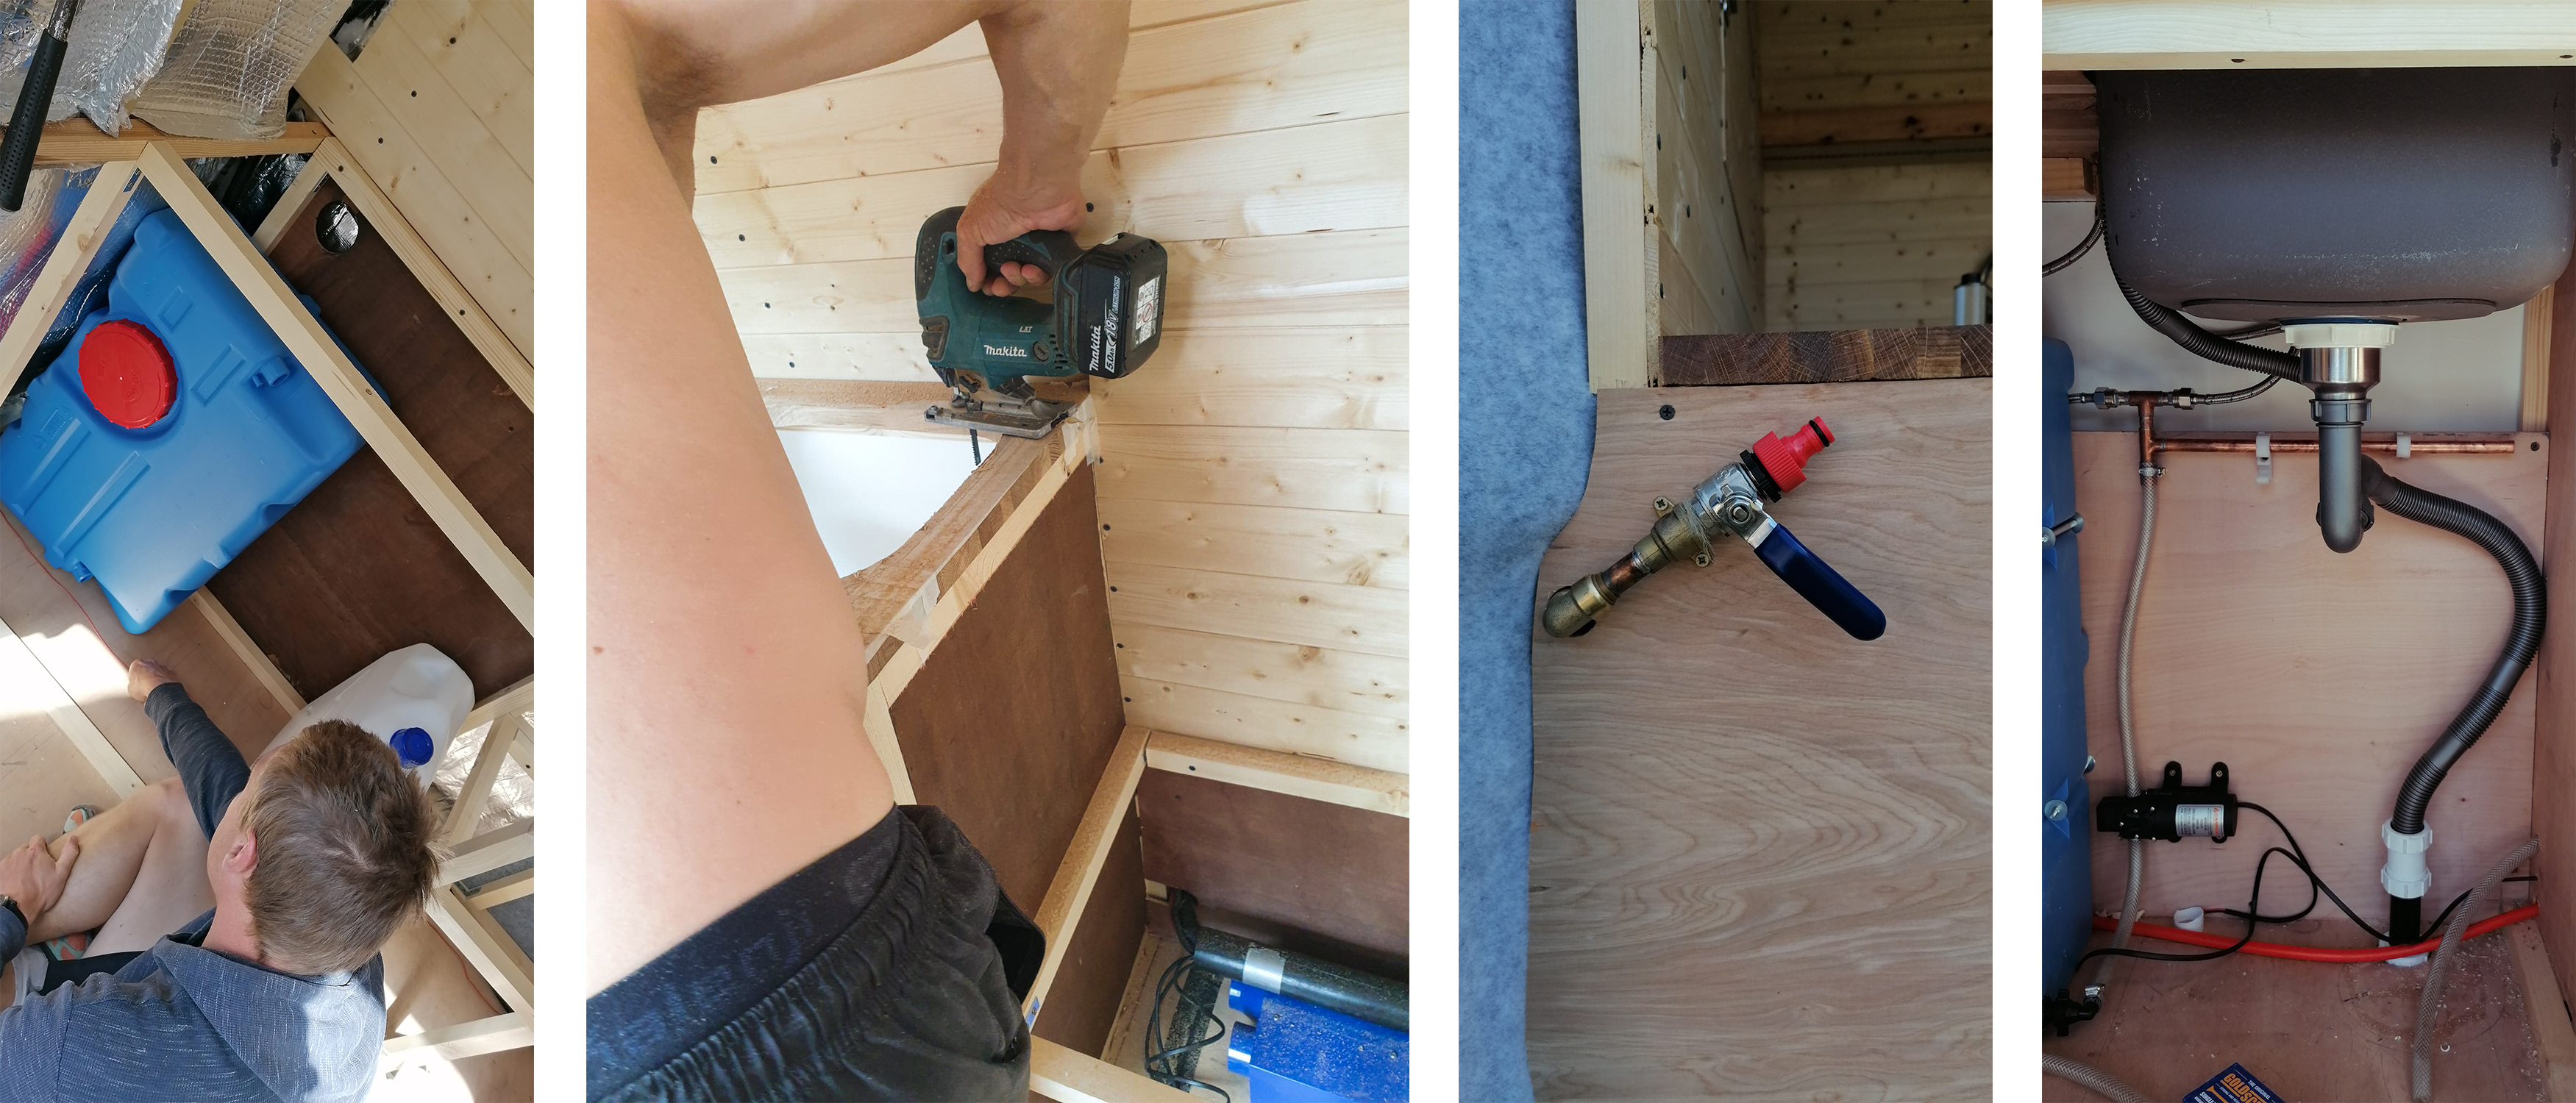
The blue Fiamma water container is 70 litres (from Leisure Plus Direct as it was way cheaper than everywhere else) and we do have a backup waste one which needs to still be plumbed in. We put a tap on the edge near the side door so it is easy to fill up.
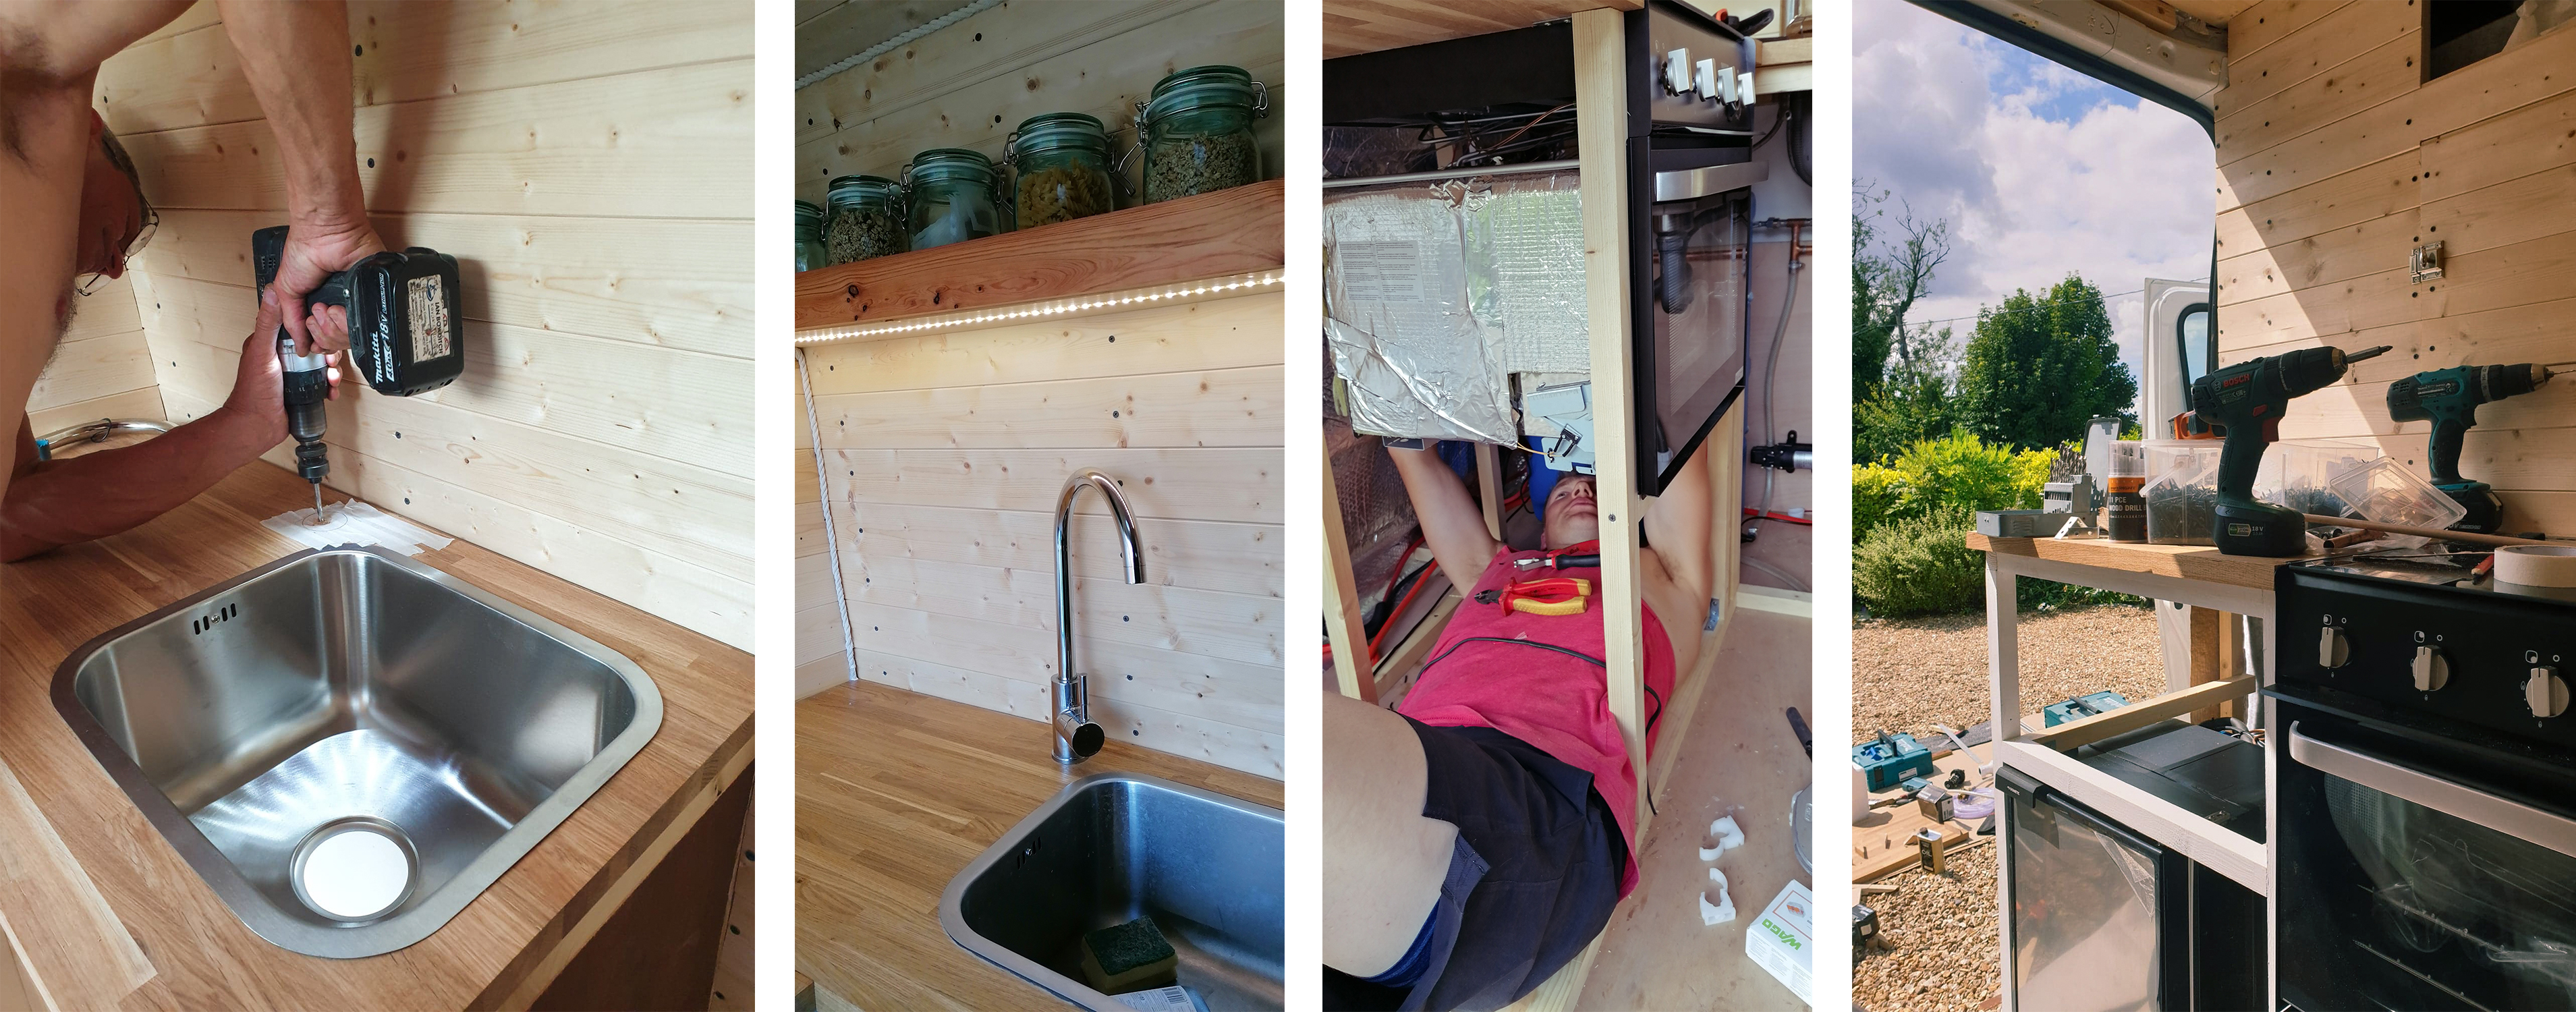
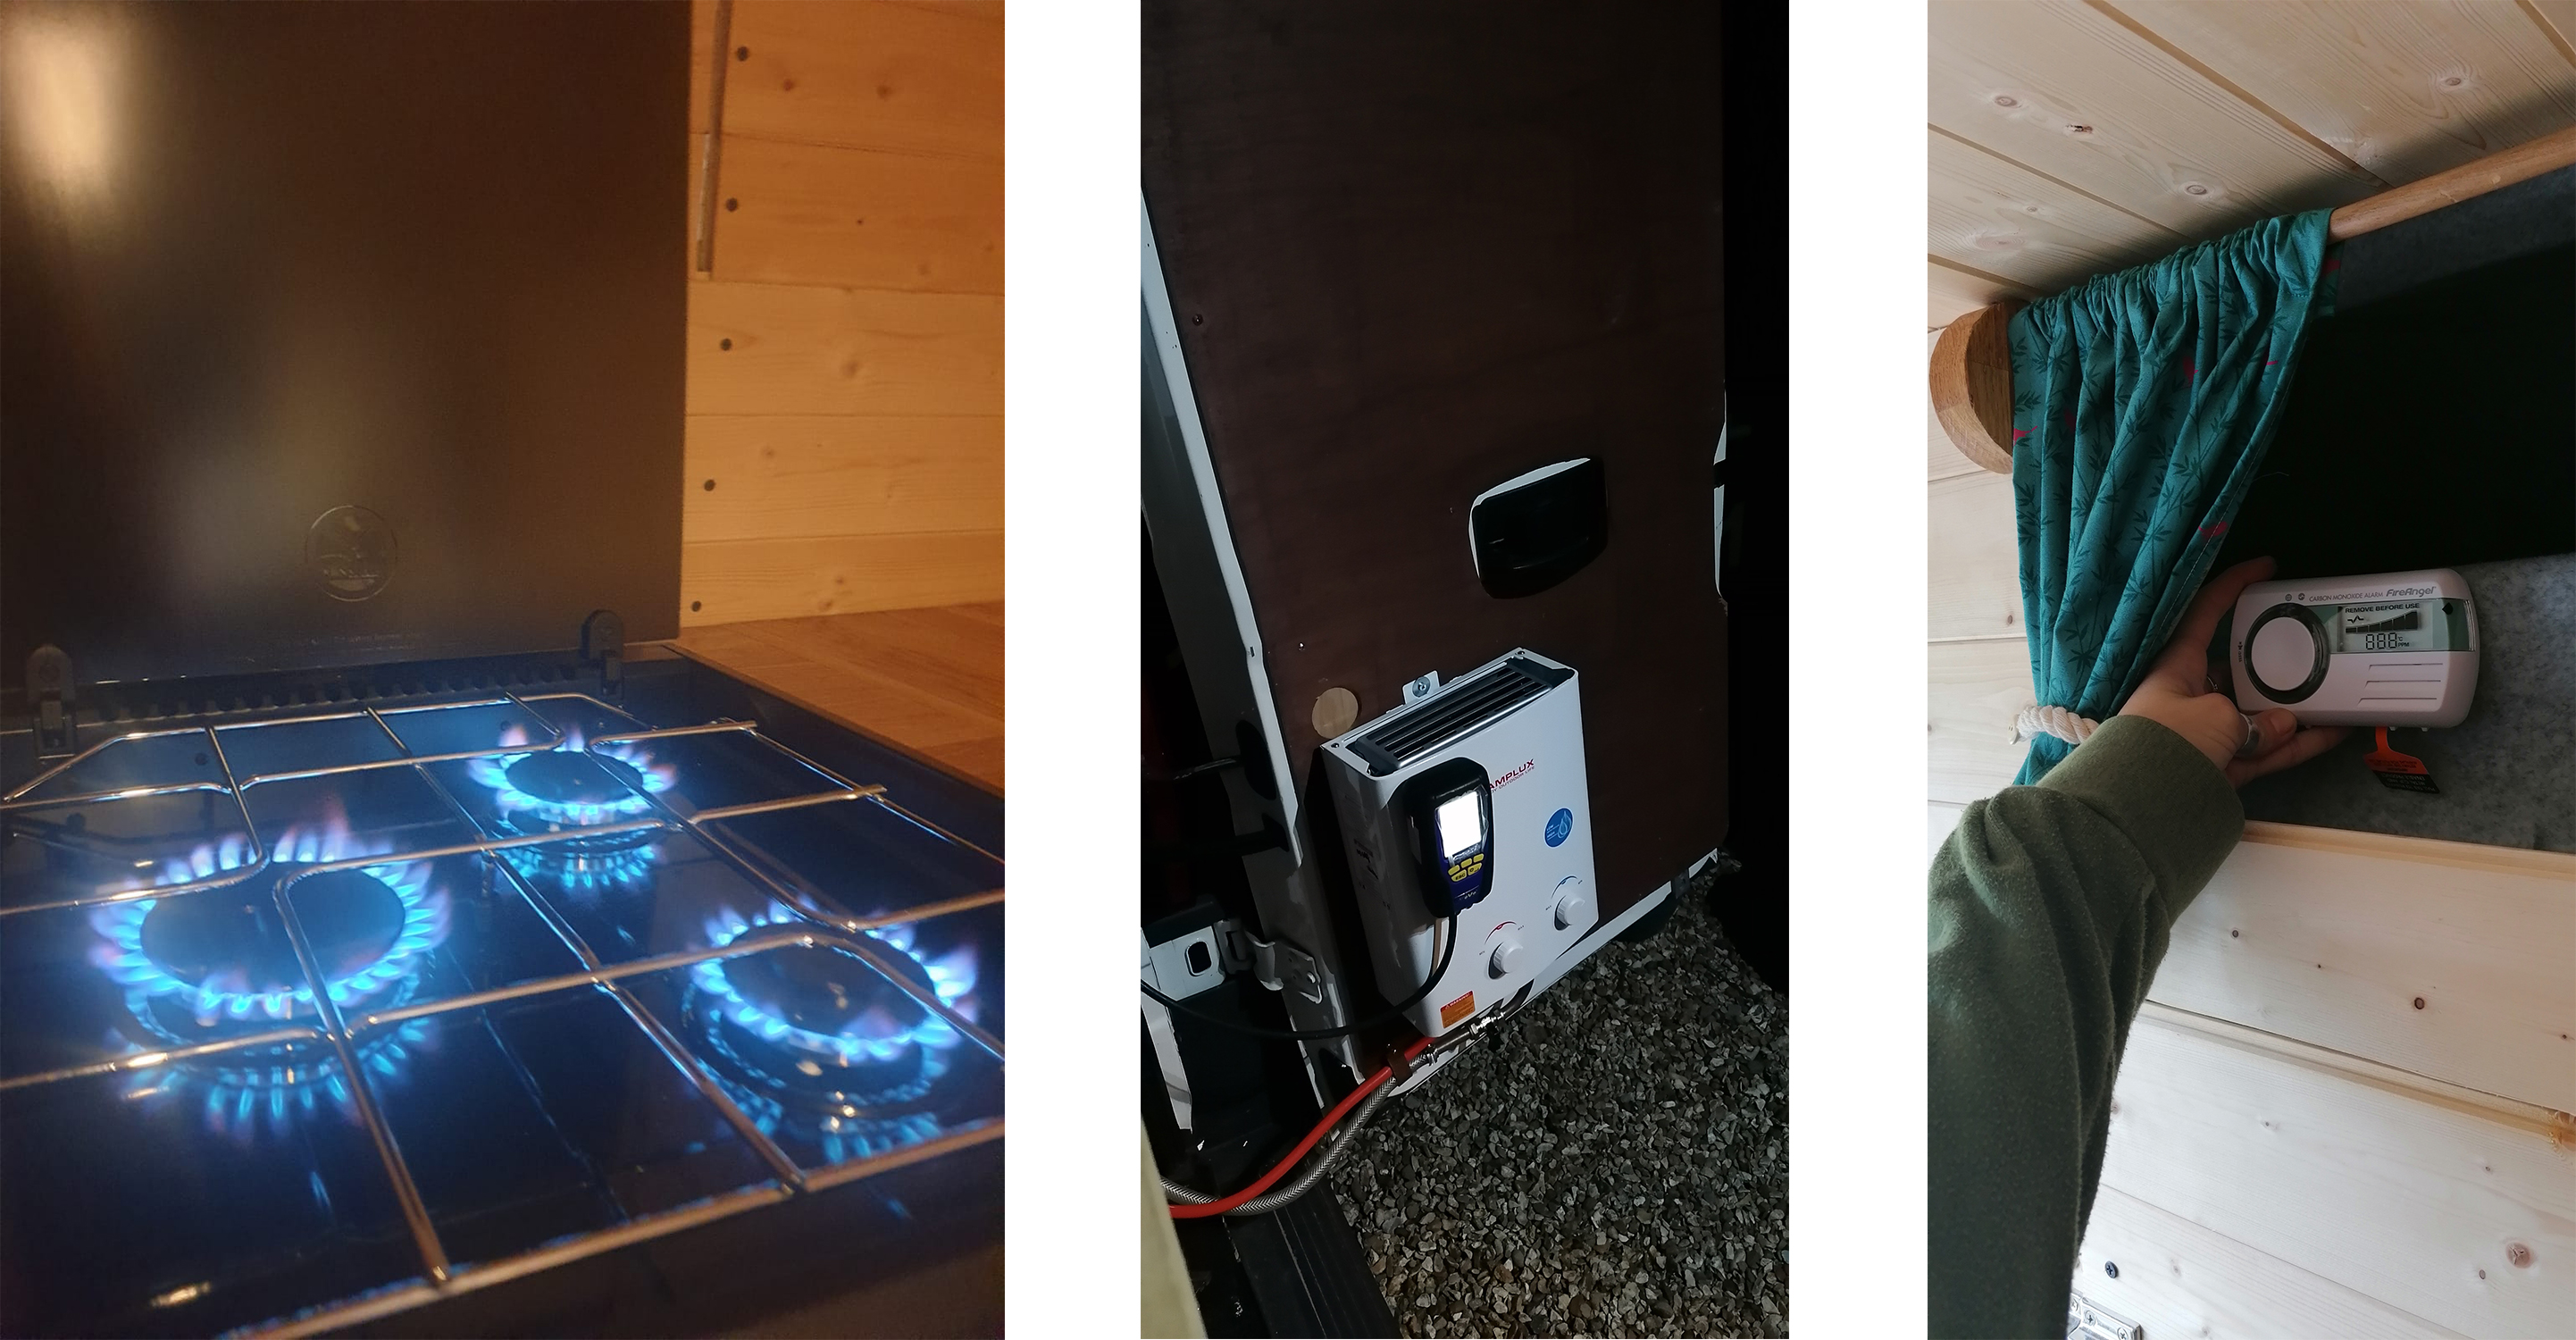
Then once the sink was sorted we put the gas oven in place and then the fridge. We chose a Dometic CRE-50 Compressor 45 litre fridge – it was the biggest we put in our budget and probably the most expensive item in the van. The oven we chose was a Thetford Spinflo Triplex LPG oven, grill and hob. I can’t wait to try baking. The Fiamma Water Expansion Tank Accumulator was also used but not in these images. Will be uploading final images in due course!
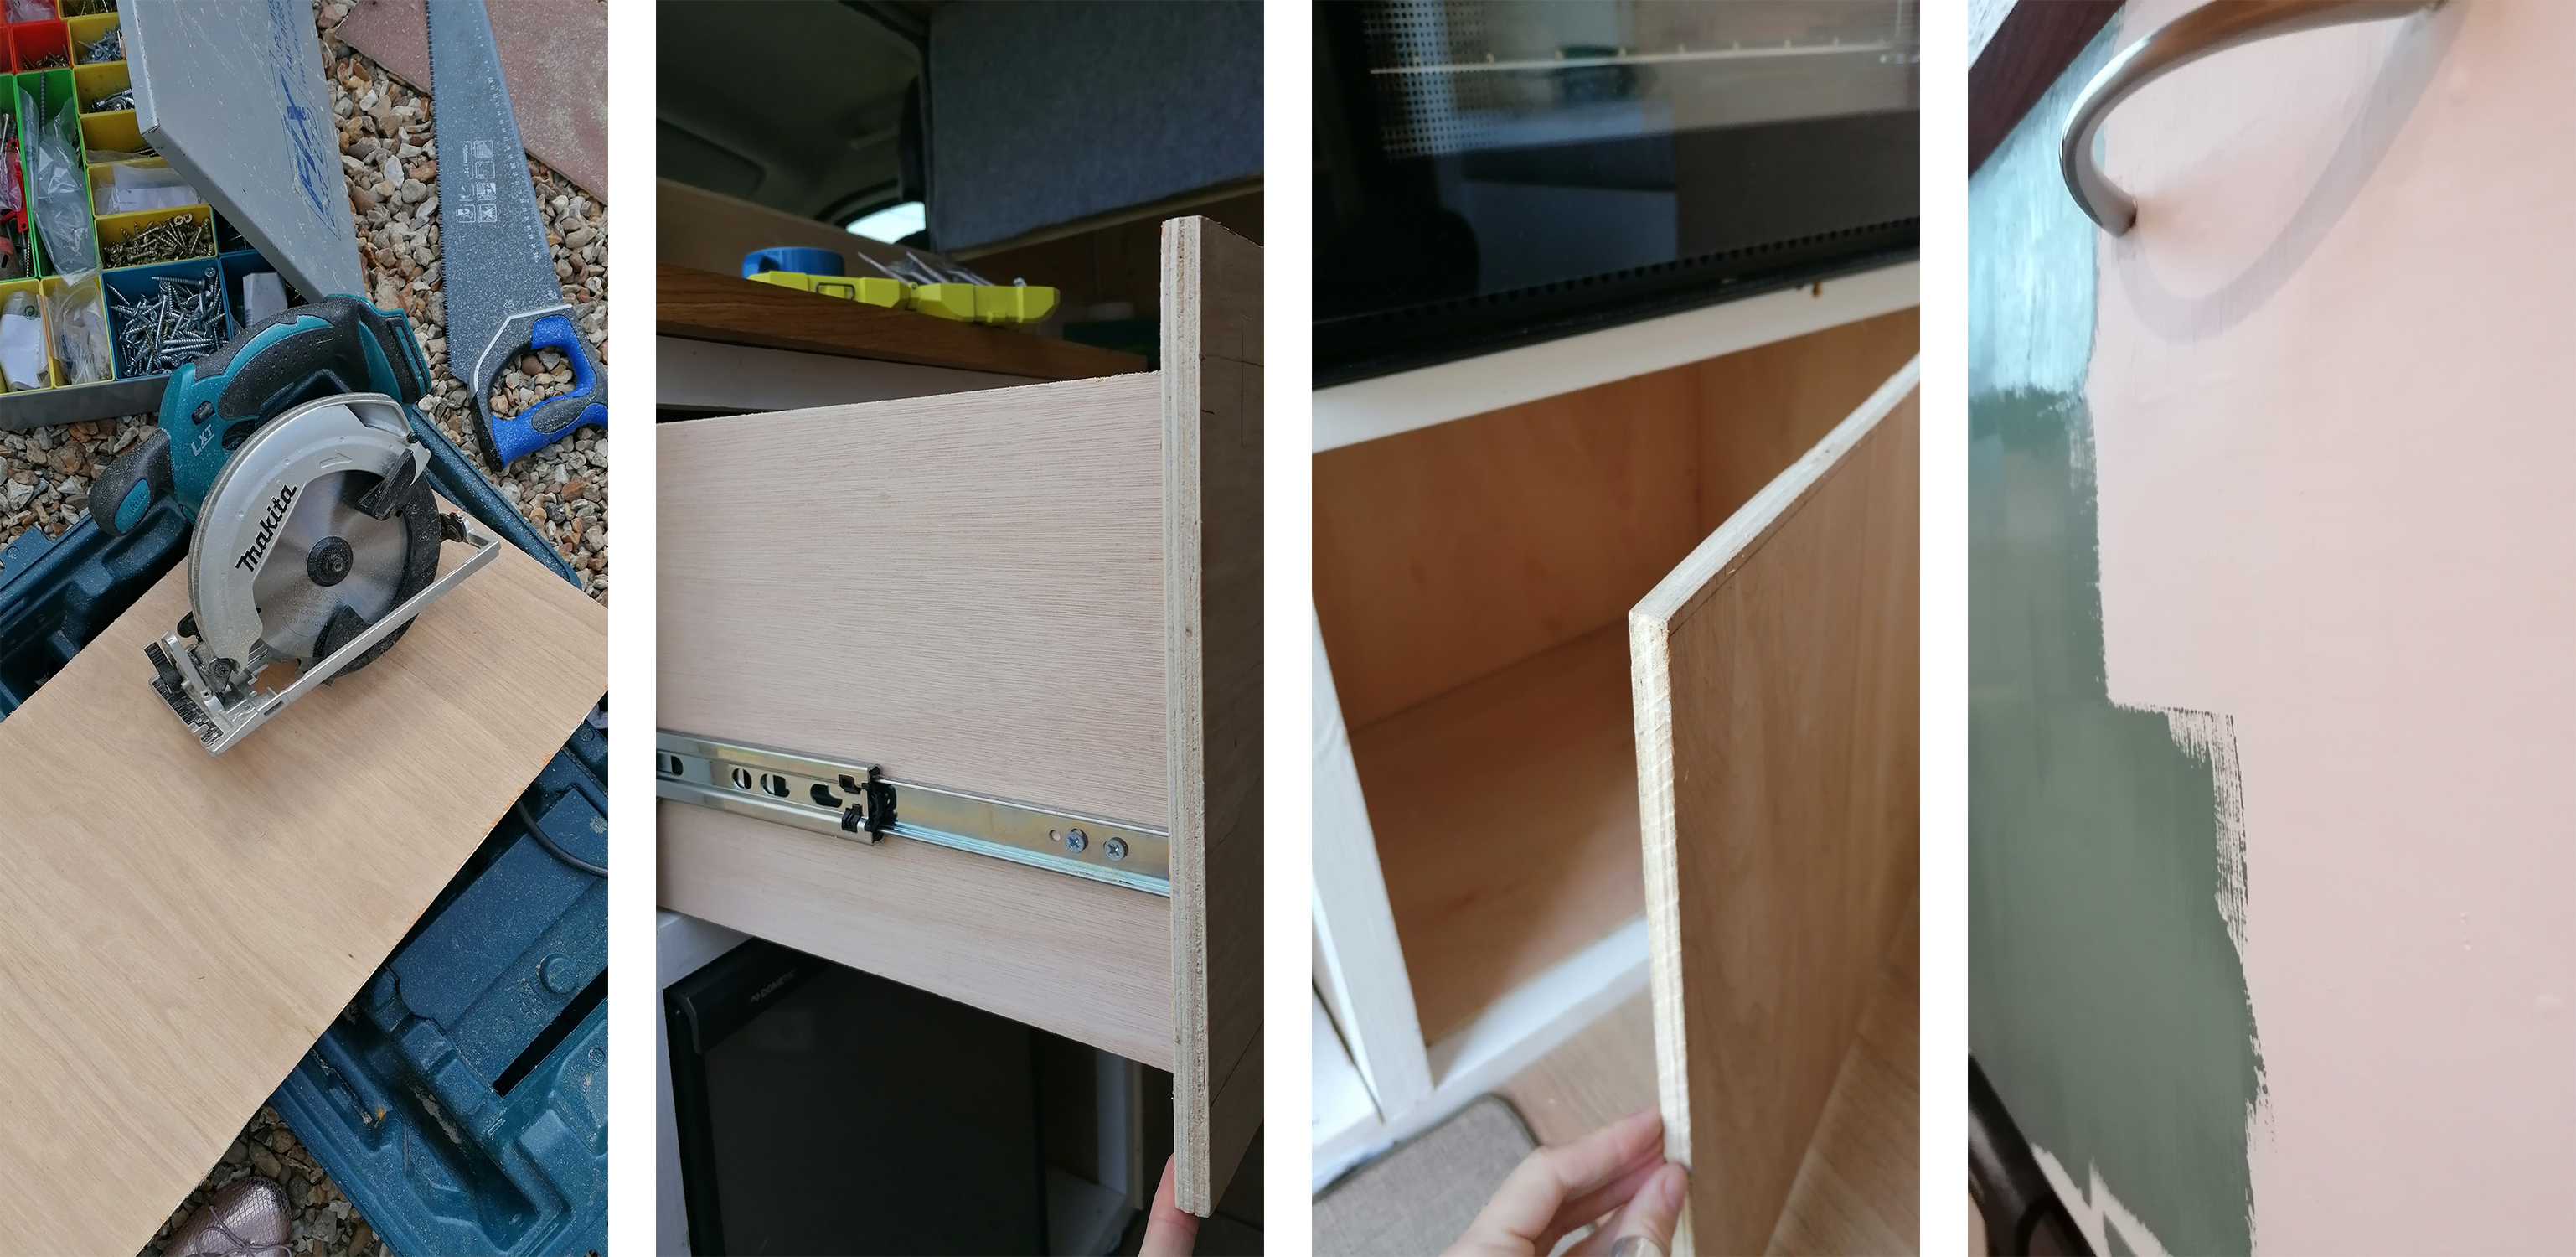
The drawers we done at a later date and we went for a mix of soft closing drawers and just plain doors. The handles we got from Wix and I had the green paint made up at Homebase. I am really happy with the overall look so far!
Stage 9 thoughts:
We would have insulated the pump against the back plywood as it is quite loud. We are going to make a box and insulate it around the pump.
This is probably where we spent most of our money so research here is key!
Stage 10 – the seating area
We decided for two chairs either side of the pull out table. Both chairs would have storage in them. The one of the left will house the gas heater and the one nearest the door will slide out so two people can sit on it if we want.

I’m really happy with this design. I wouldn’t change anything about how they turned out. Whilst here we did some other bits and pieces, like adding a side onto the wardrobe section (photo below) and adding a piece of J piping above the sliding door so the rain water wont drip into the van. It worked pretty well when we tested it with a watering can.

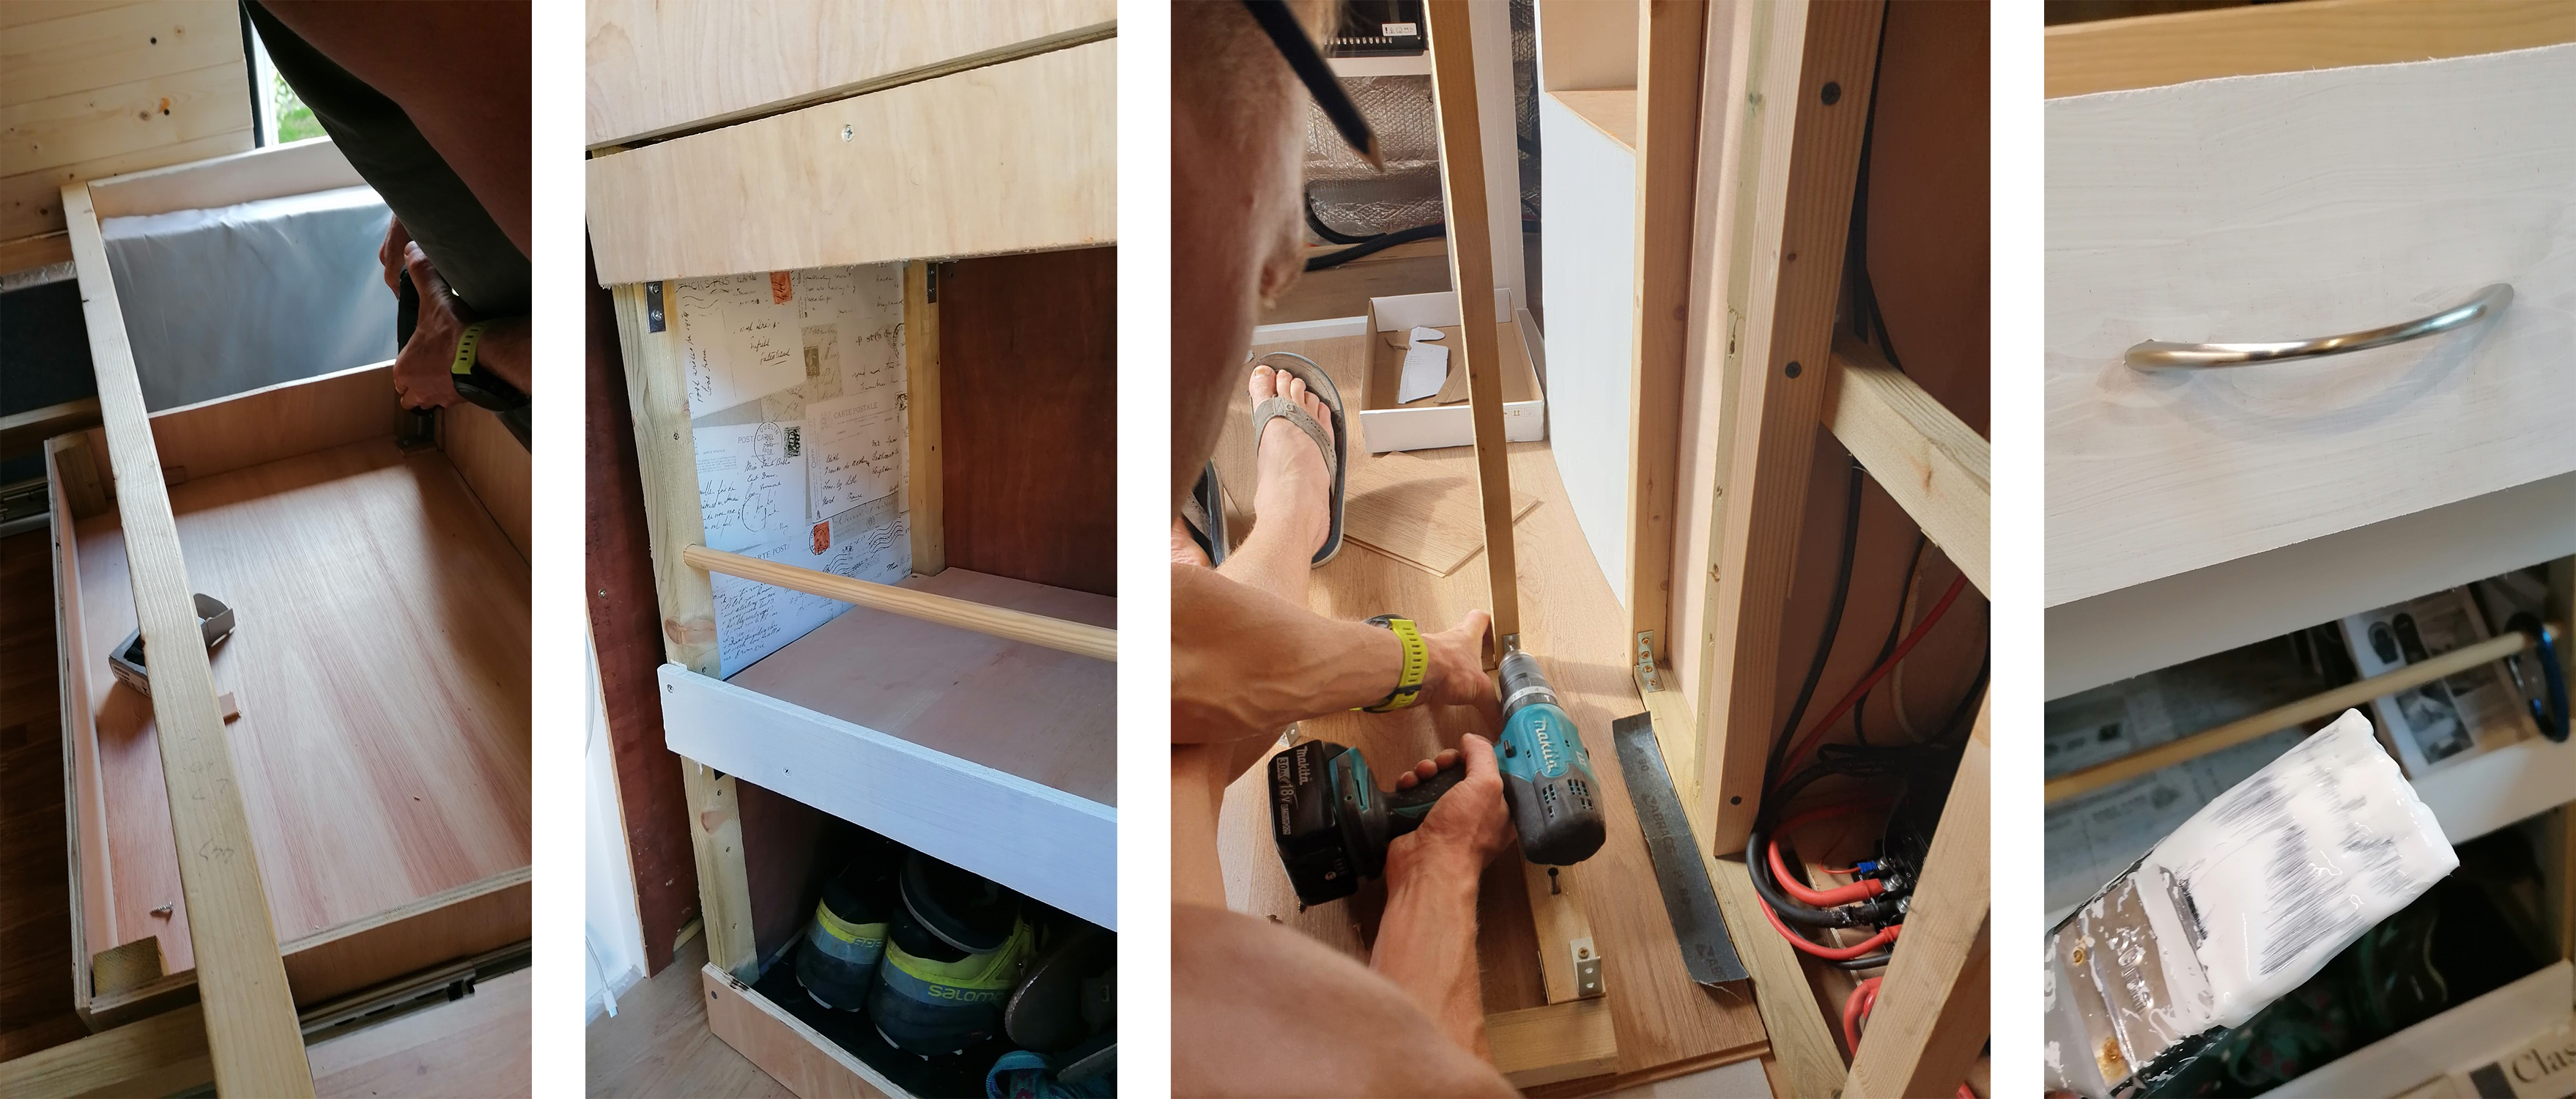
During this stage we started on the pull out table and middle storage section that is under the foot of the bed. We will have storage for shoes at the bottom, then a book shelf. Then the table and a pull out drawer on the top. These will all get painted white and lined with wallpaper I have stored which I brought for £1. It is finally starting to feel like a home!
Stage 10 Things we would change:
If we could we would have made the slide out seat on an incline so we have a bit of storage behind the back rest section, but we aren’t the best at working with angles so we decided to keep it simple.
We have a narrow gap to the left of the bookshelf so are now working out what to do with it. Probably will put a retractable tea towel rail in there for drying clothes.
Stage 11 – gas, side door & extra bits
The gas is in! We have the oven, hob, shower and the heater running off the gas. We decided to go for a Gaslow refillable system which seemed like the simplest option when thinking about refilling etc. We also got the whole system tested for leaks and it was fine, plus we have fitted a carbon monoxide monitor above the stove.
Initially we were going to clad the side door but then decided against it because it would be too much weight and you never see the lower part of the door so we decided to carpet both. It looks really smart now so I am glad we did this.
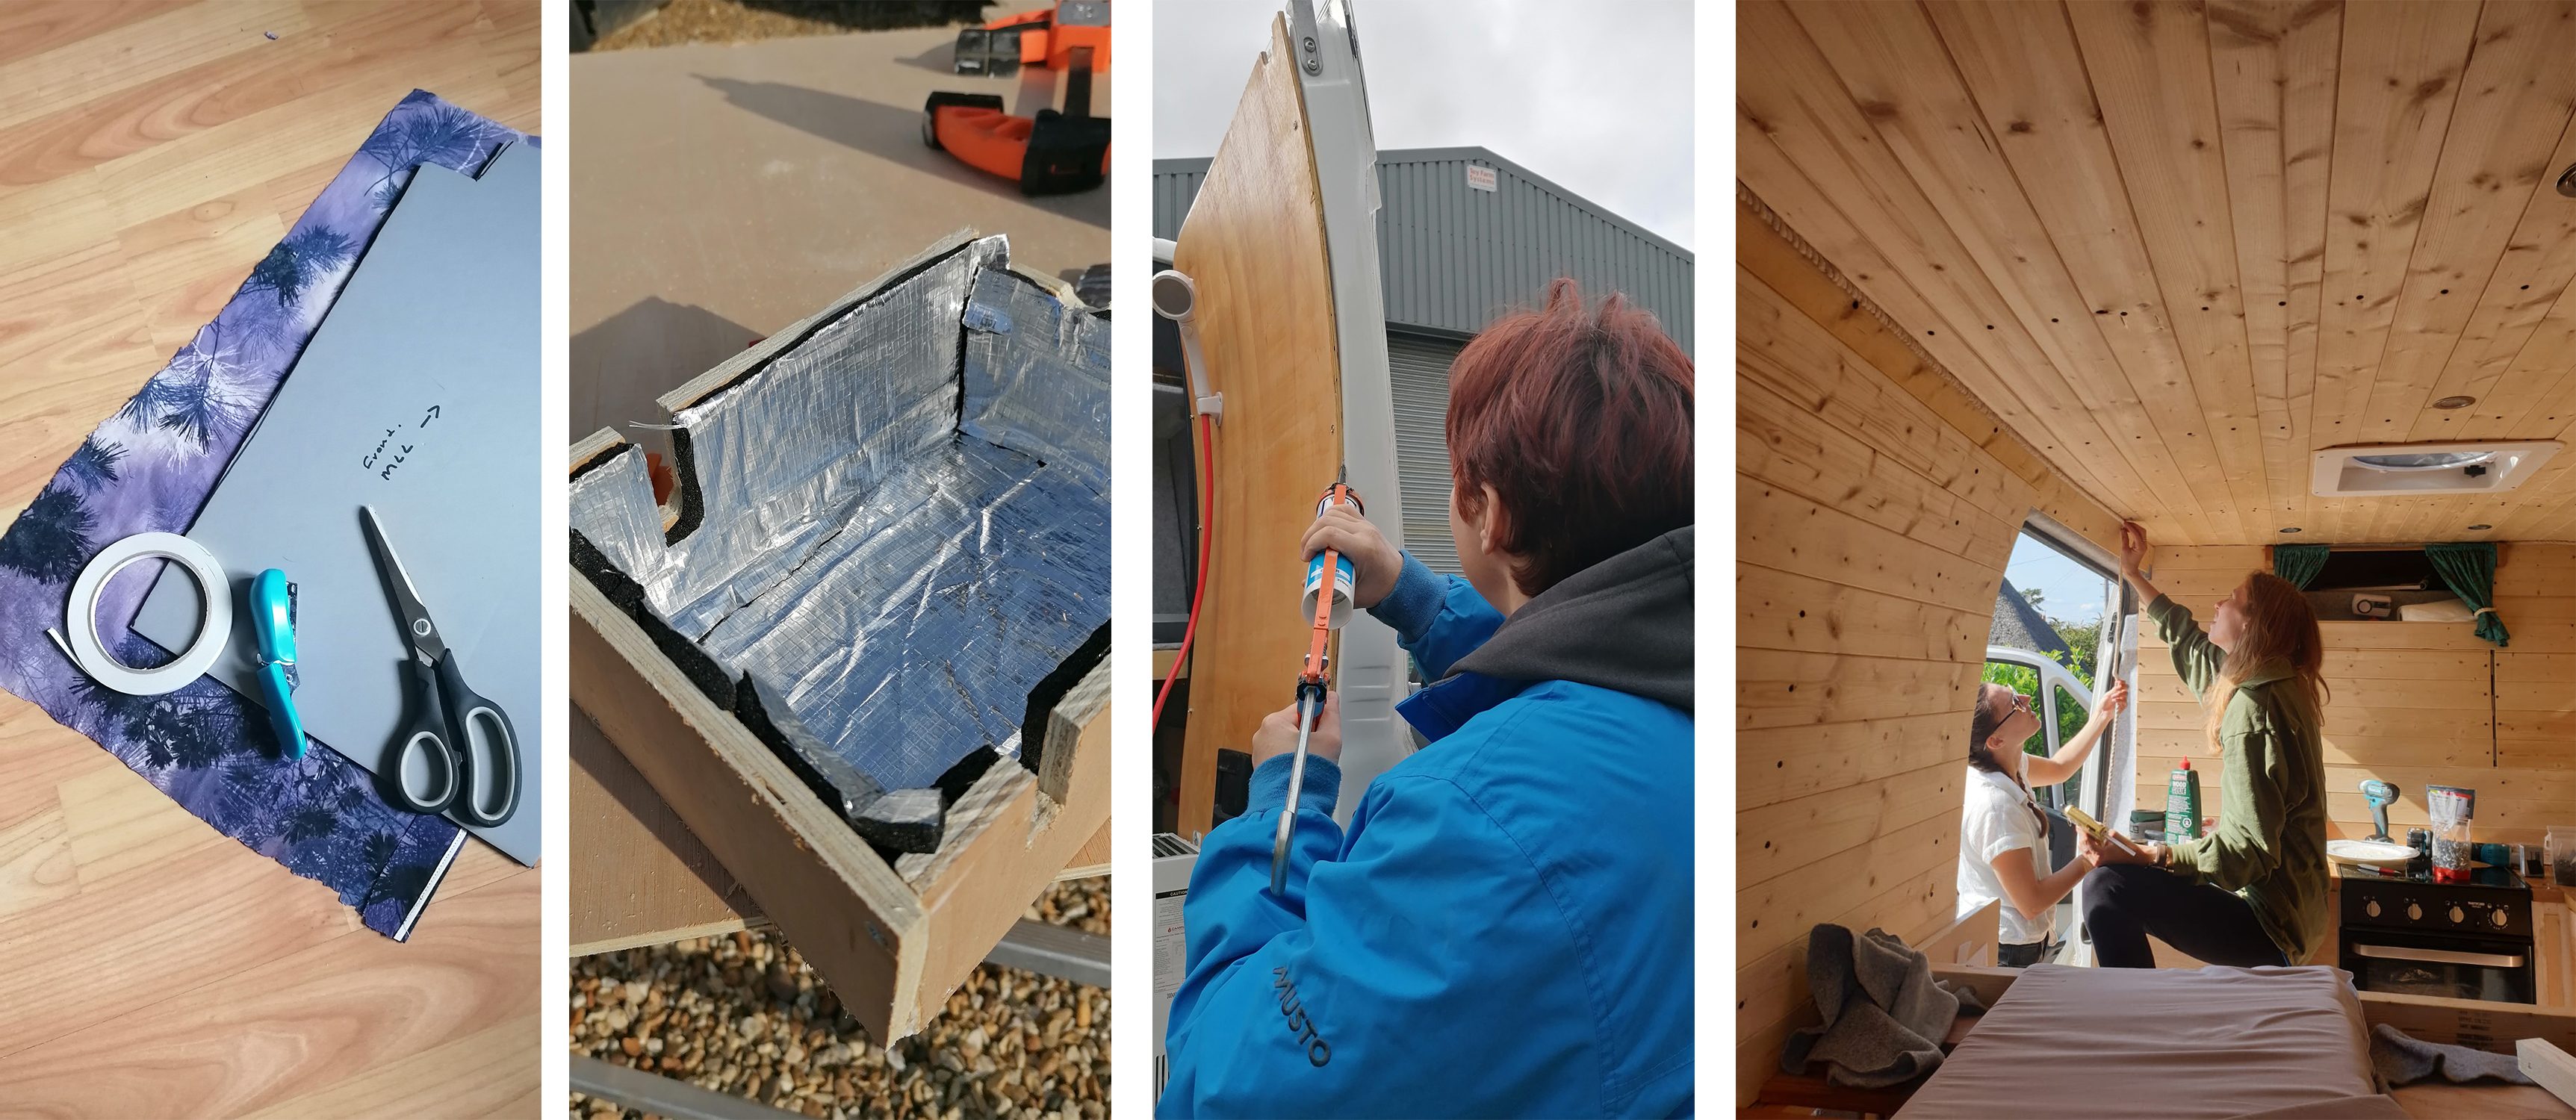
The final bits we did before my final post of the finished van includes making some dividers for our wardrobe. We made these out of cardboard foam, fabric and some double sided tape. Then we made an extra insulated box to try and quieten the sound from the water pump. It has quietened it slightly but you can still hear it.
My sister then got involved and helped put sealant around the waterproofed mdf on the back doors. This is where our shower is going to be and will also get rained on so need to make sure that not water gets through to the insulation. One of the final stages is putting up the rope around the edge to finish off the van. My lovely friendly Teale helped with this step. Then finally I wanted to share a picture of my late dad who oversaw the whole build…
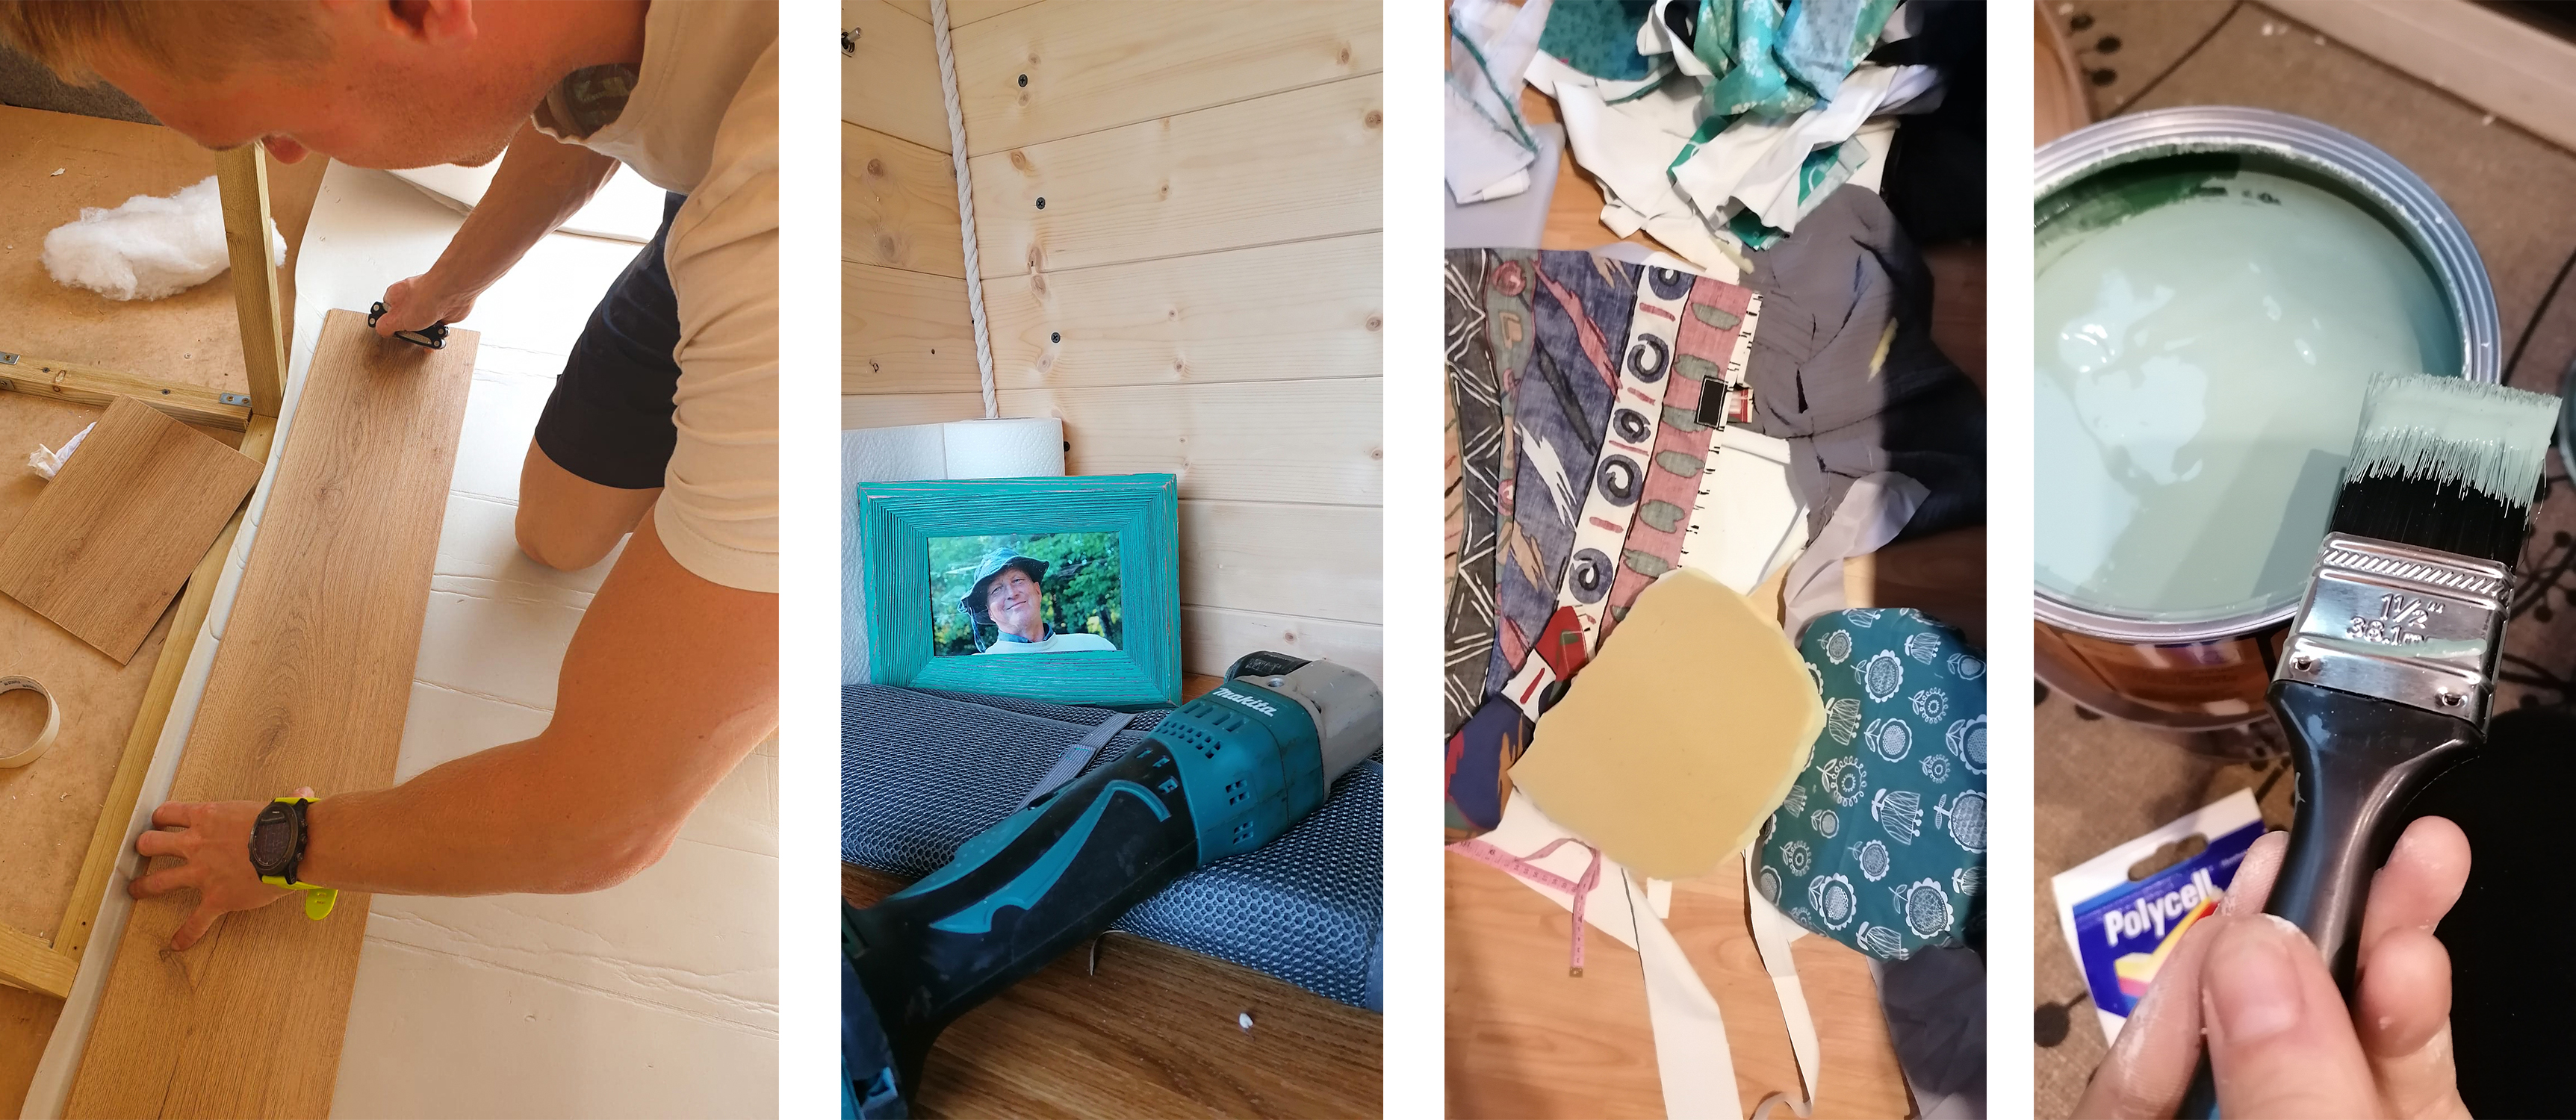
One of the last things we did was put the flooring in and then I made head rests for the front seats from some more remnants of material I had. I was so excited to share with you the colour that we are painting the drawers. It was one we had made from Dulex. So pleased with how it came out!
So I think this is the last blog post of construction. The next time you hear from us will be with the final images! Thanks for everyone’s support throughout the whole build and I hope this blog has helped many others on their van diy journey.
Remember to follow us on Instagram.
To view the blog about the items we recycled visit here.
To view the blog about our favourite parts of the van conversion, visit here.
This blog includes affiliate links (all genuine!)
Discover more from Holly Brega
Subscribe to get the latest posts sent to your email.

4 thoughts on “The DIY Vanlife Adventure”
Comments are closed.